Manage multiple online accounts using physical devices with VMLogin’s virtual browsing profiles which helps enable anti-association capabilities as well as fingerprint protection.
Here is a step by step guide to integrate Oxylabs with VMlogin
1.Download and install VMLogin here(3 Days Free Trial)
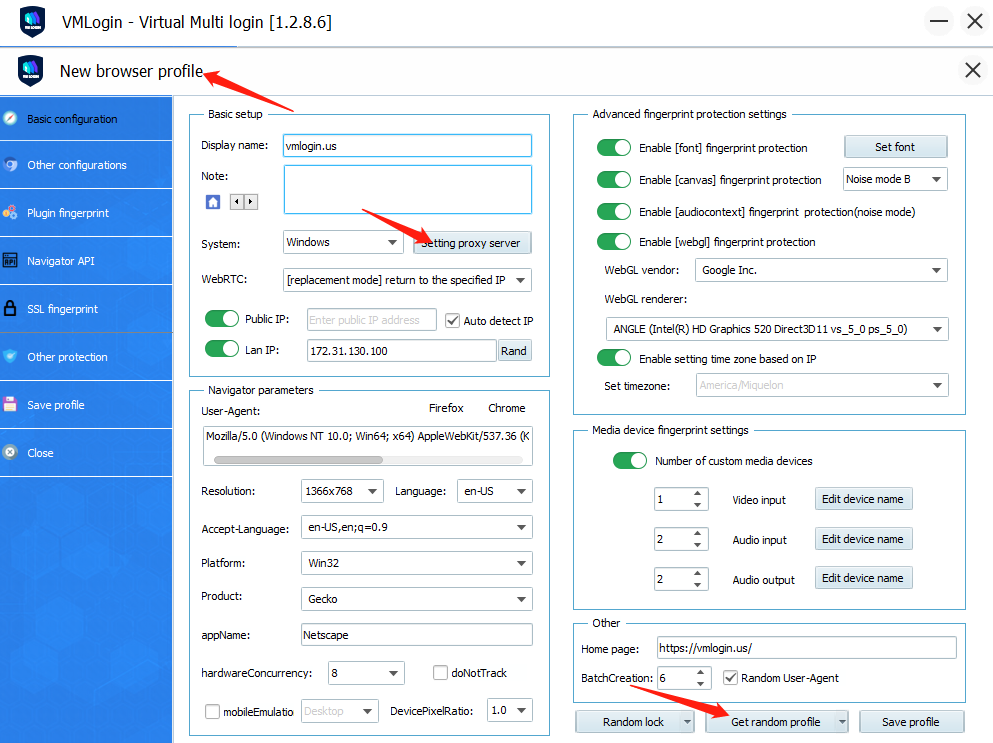
2.Start by launching VMLogin and creating a new browser profile:
(1)Click “Get random profile"
(2)Select the settings that best suit you, such as operating system,
screen resolution, language, WebGL vendor, time zone, media device fingerprint etc.
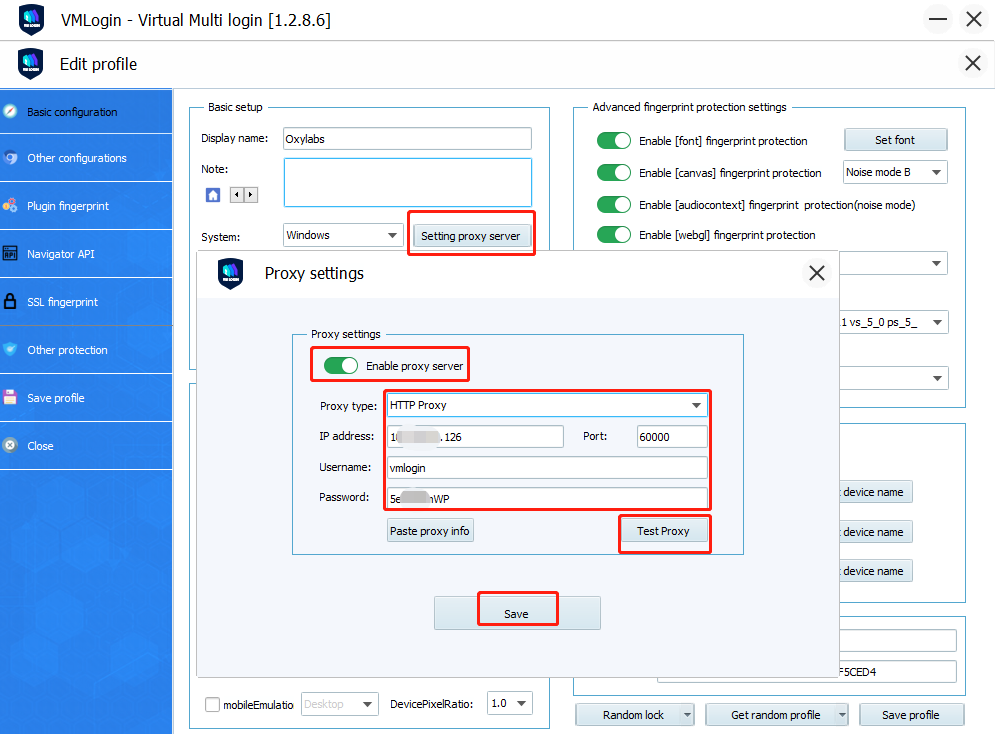
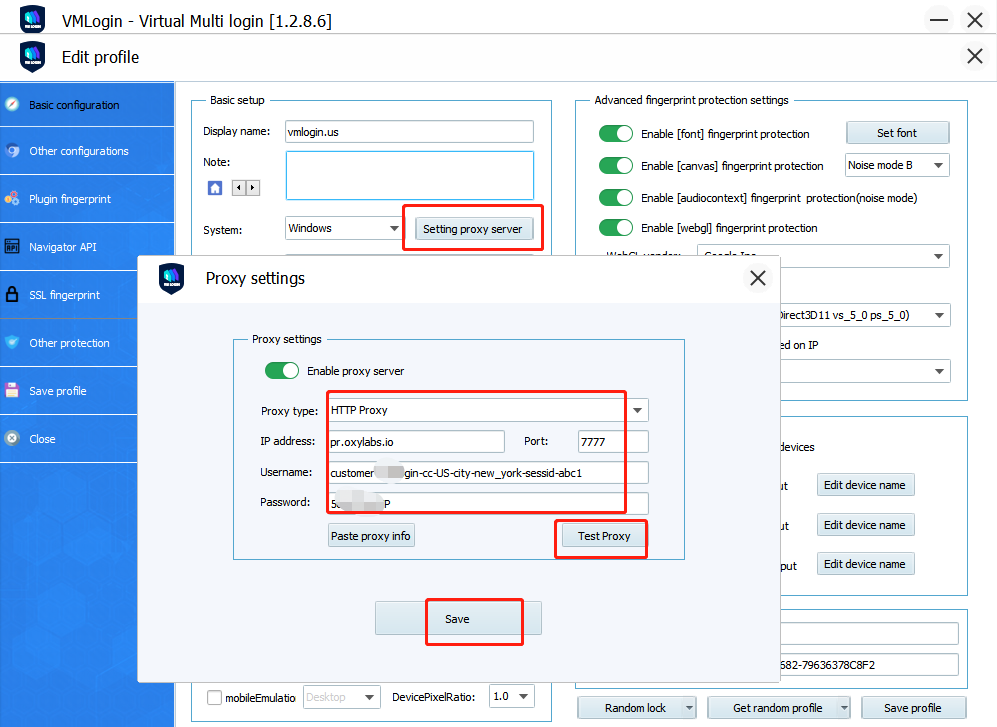
3.Setting up the proxy server with your browser profile:
4.Start with Oxylabs proxy
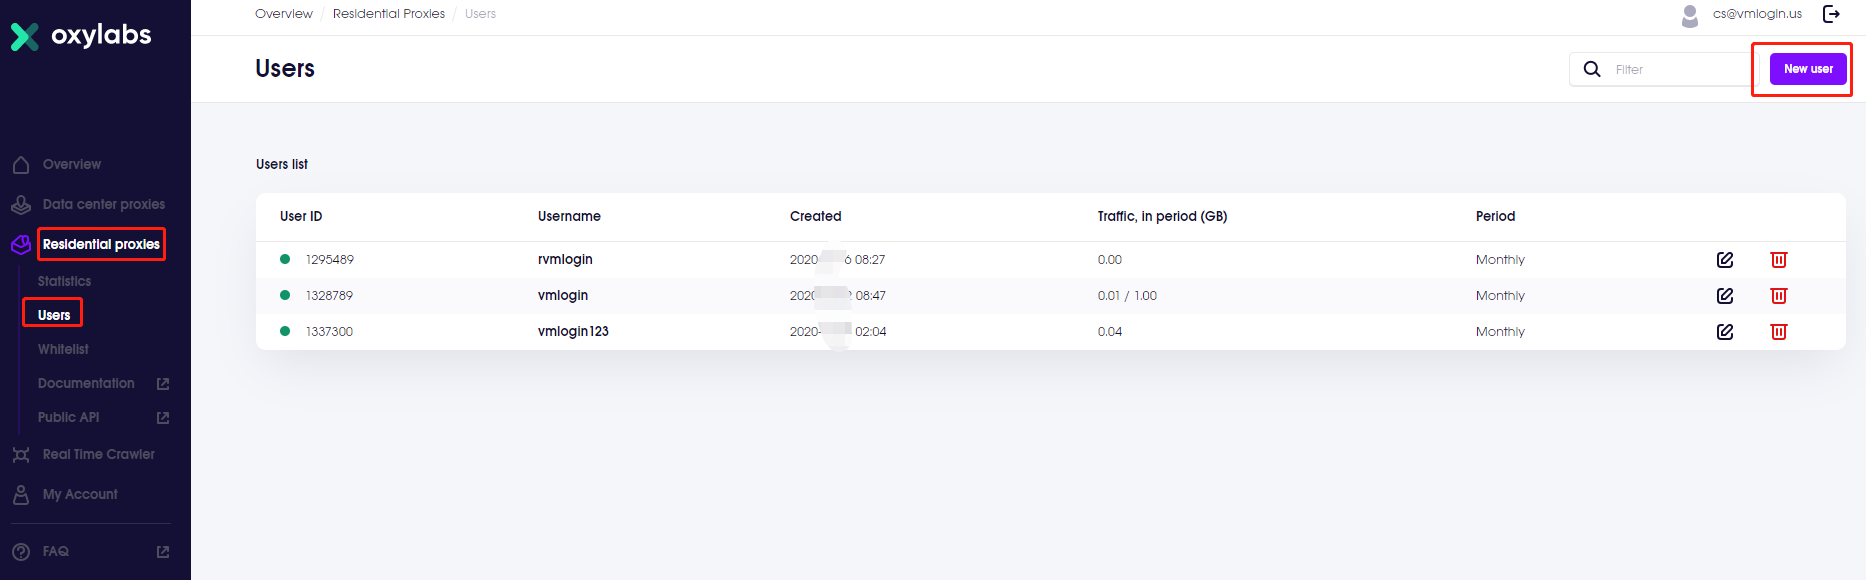
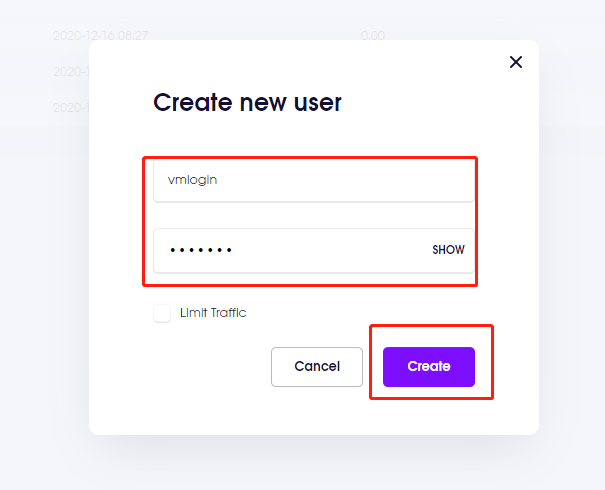
Login Oxylabs -> Residential proxies -> Users -> New User -> Create new user
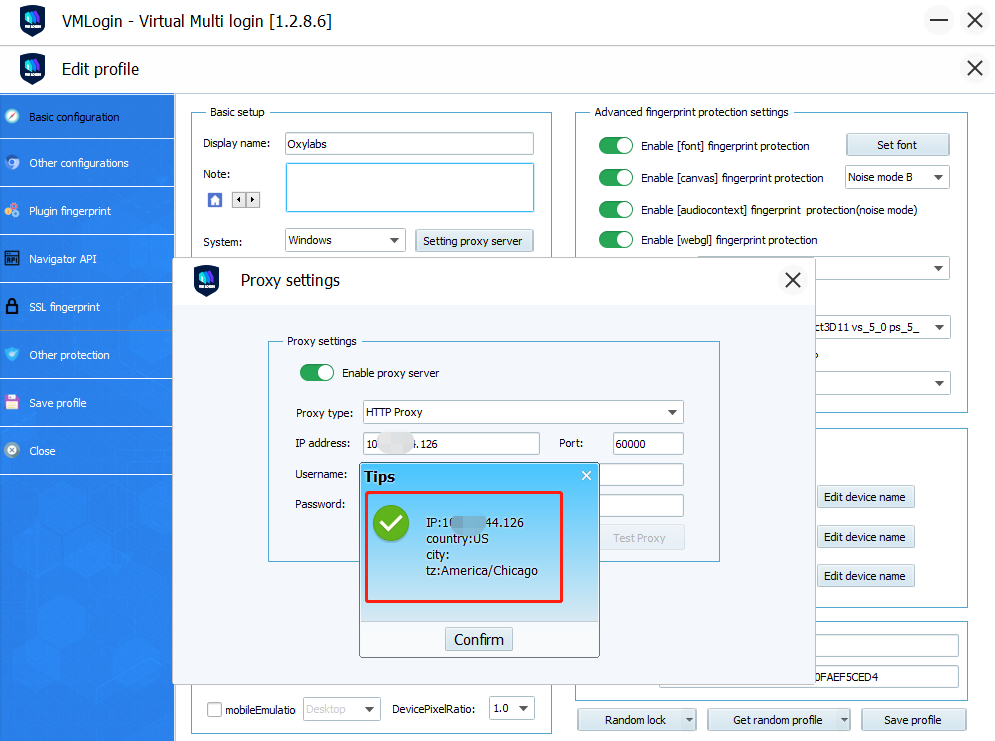
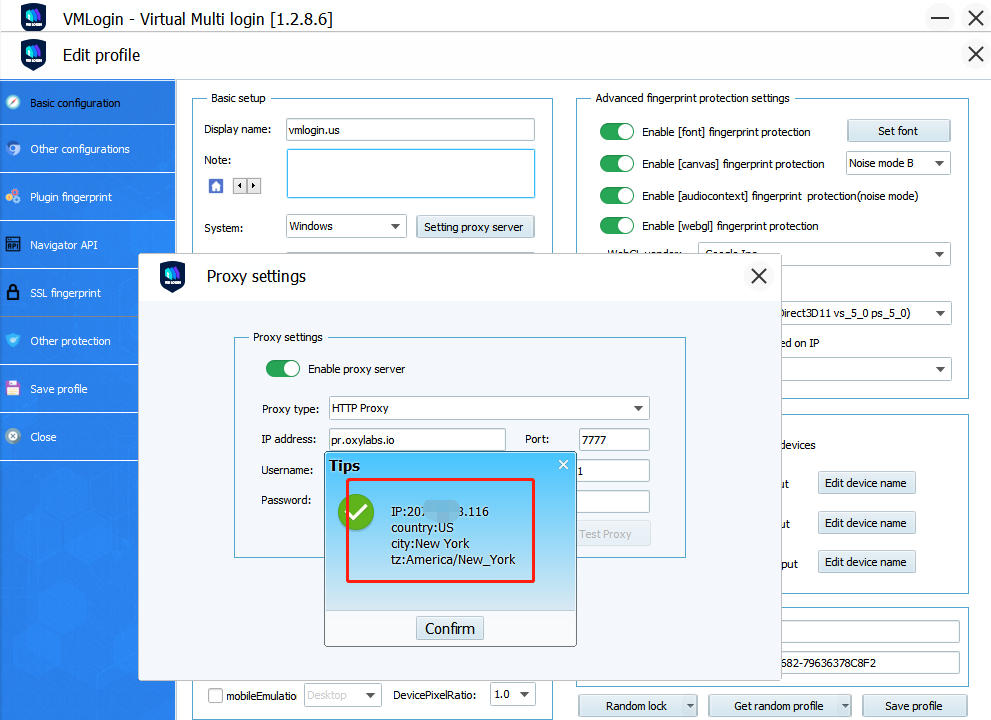
In the following choose Http as the Connection type. Under IP or host enter pr.oxylabs.io. Fill in 7777 for Port. Finally, enter your login credentials under Username in customer-username format and Password. You can also use country specific entries. For example, if you put us-pr.oxylabs.io under Proxy IP or hostname and 10001 under *Proxy Port, you will receive US exit node with sticky session. You can check if the proxy works by clicking “Test Proxy”. If everything is fine, save profile and launch the browser.
The screenshot of Dynamic IP:
The screenshot of Stastic IP: