Step 1: Launch the 9Proxy application and log in to your account.
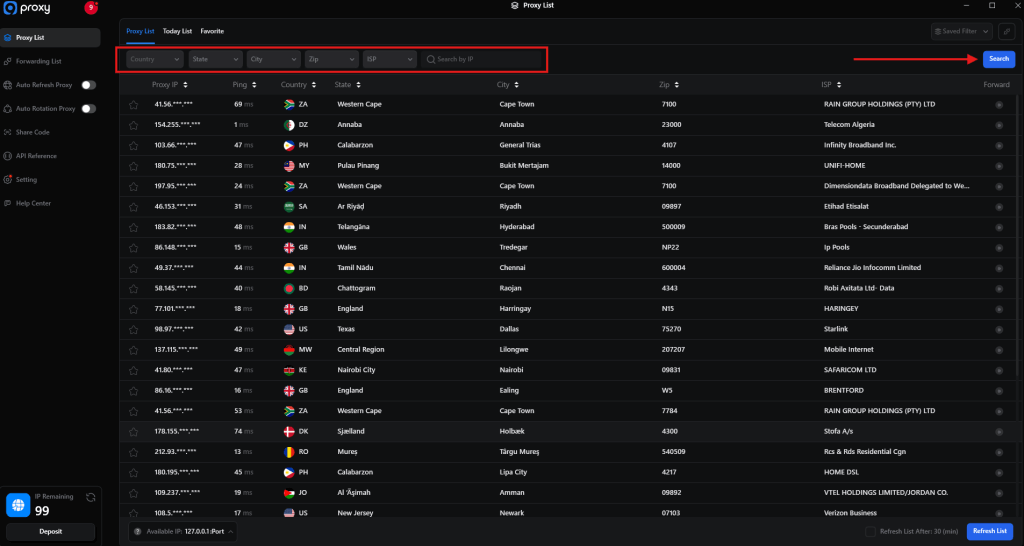
Step 2: You fill in important information fields such as Country, State, ... and click on the magnifying glass icon next to search.
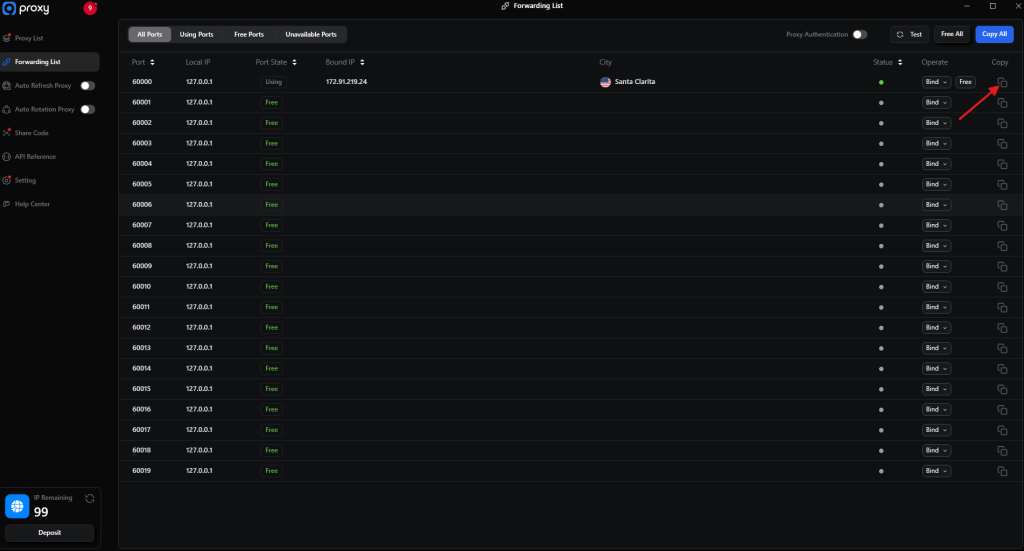
Step 3: Right-click on the proxy of your choice, select "Forward Port To Proxy" and select the Port number (e.g. 60000), then click "Port Forwarding List" to view information about the selected proxy.

Step 4: Copy the proxy to get ready for installation.
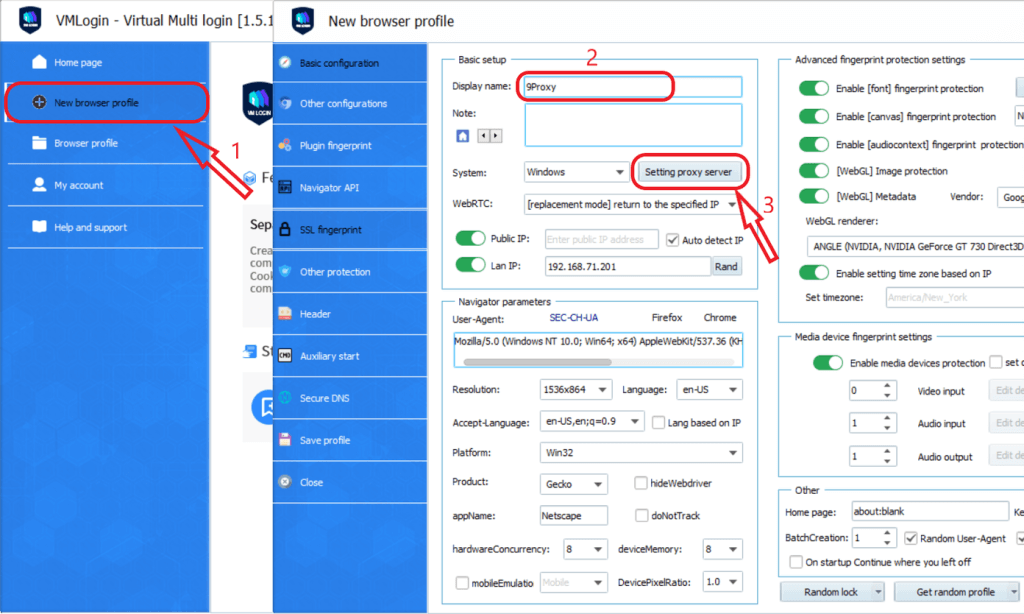
Step 5: Launch the VMLogin and log in to your account.
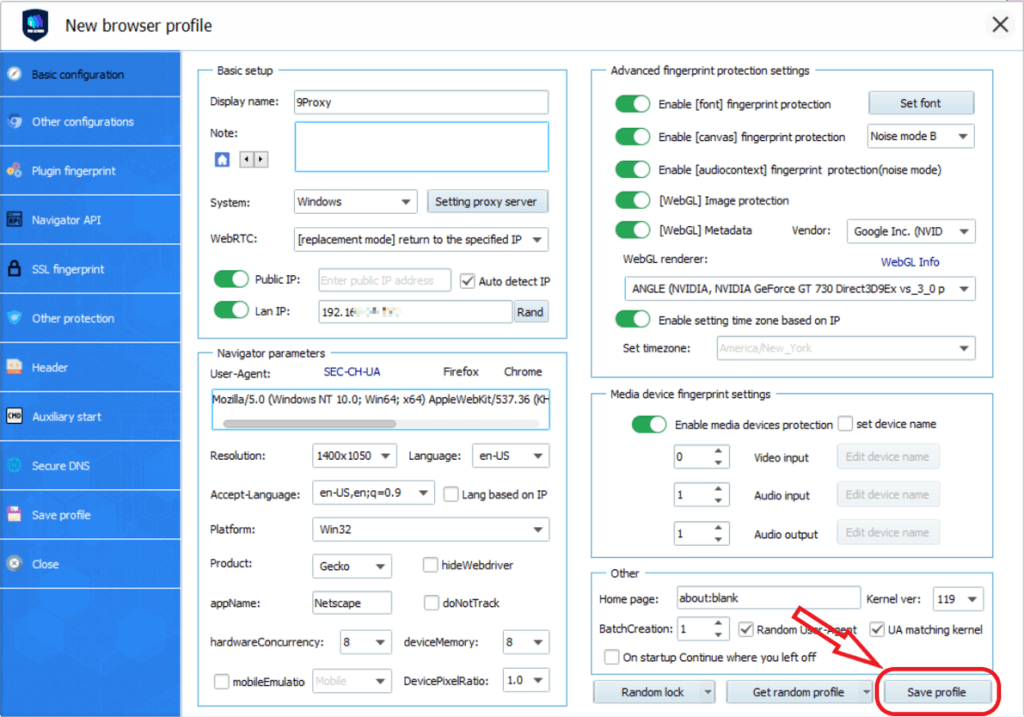
Step 6: At the main interface of the application, select "New browser profile", then enter a name and select "Setting proxy server".
Step 7: Open "Enable proxy server", select the proxy type as "Socks 5 Proxy", paste the proxy you copied earlier, and click Save.
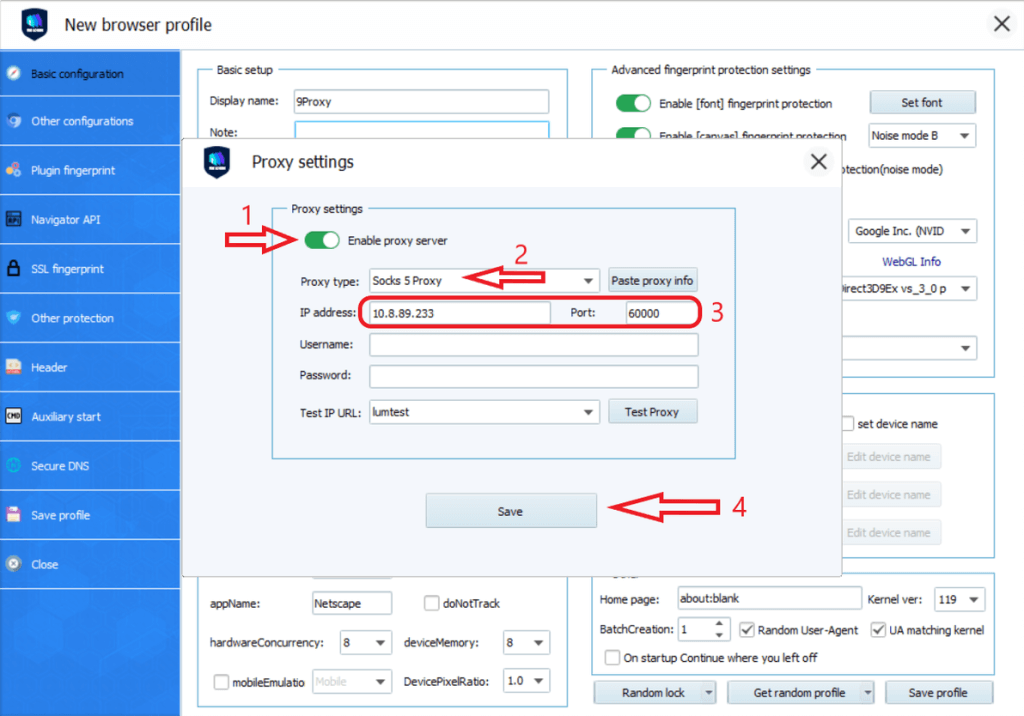
Step 8: Click "Save profile" to complete the installation and can start running.
Step 9: To run, right-click on the newly created browser and select "Launch browser".
Note: VMLogin browser software itself has no proxy IP service, users need to purchase proxy IP from a third party. Proxy-related tutorials are provided by third-party platforms and unrelated to the VMLogin. Users are strictly prohibited from using VMLogin to engage in any illegal and criminal activities, and users are responsible for the relevant responsibilities caused by using VMLogin.