Step 1: Add proxy settings
1. Access to the 911 Proxy website. Select a dynamic residential proxy on the pricing page and choose the right package to purchase.

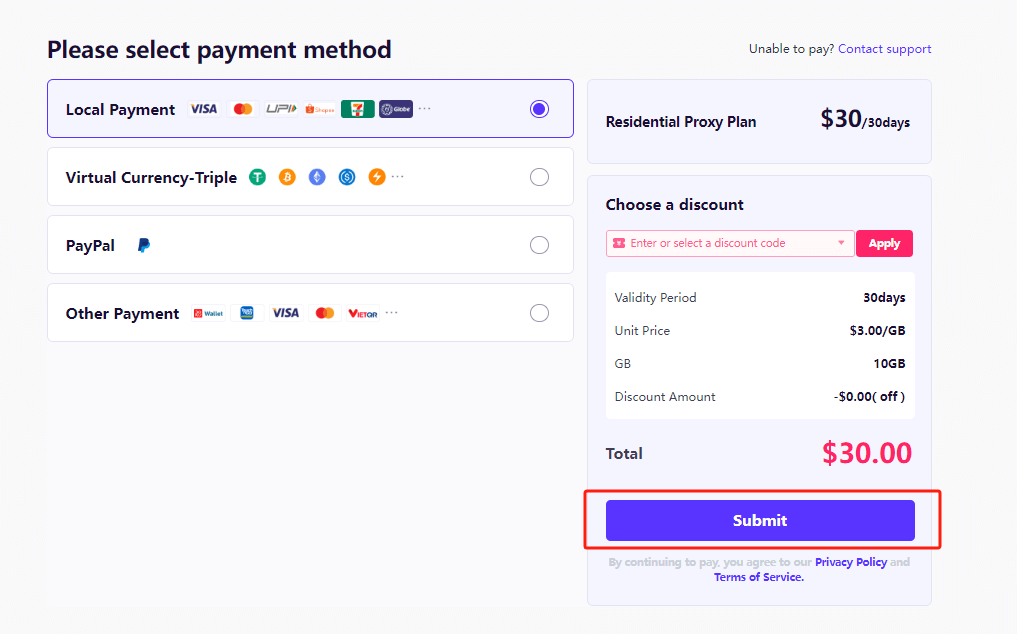
2. Select the appropriate payment method to submit.
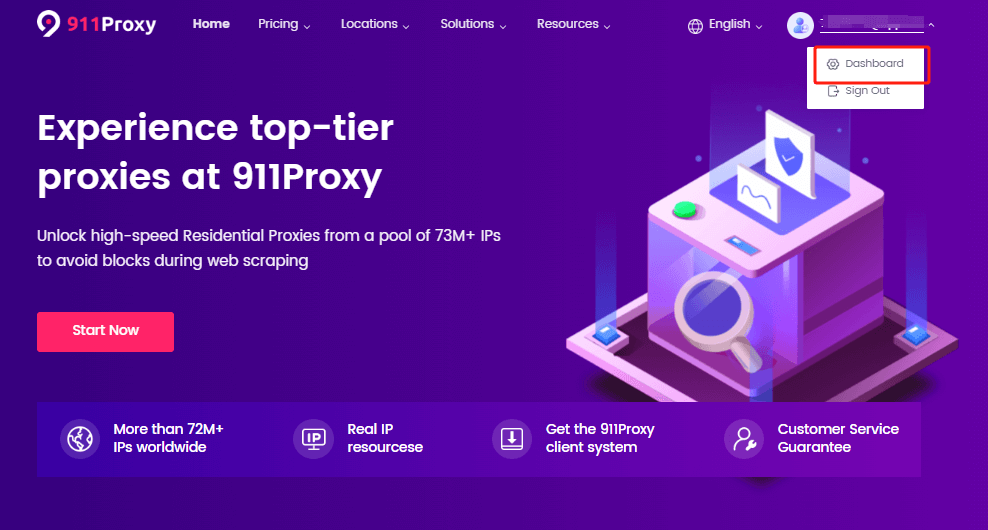
3. Click on the “Dashboard” below your avatar.
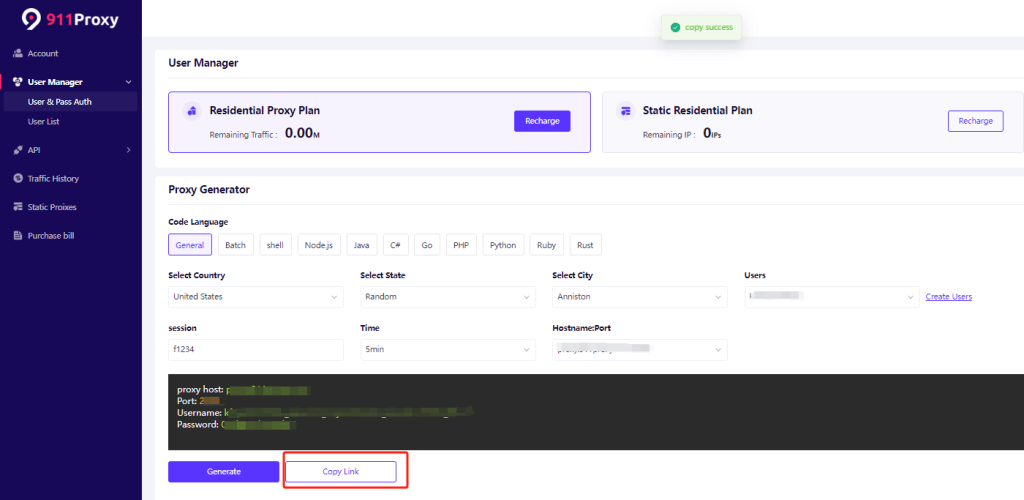
4. Click on "User & Pass Auth" to select the "Residential Proxy Plan".
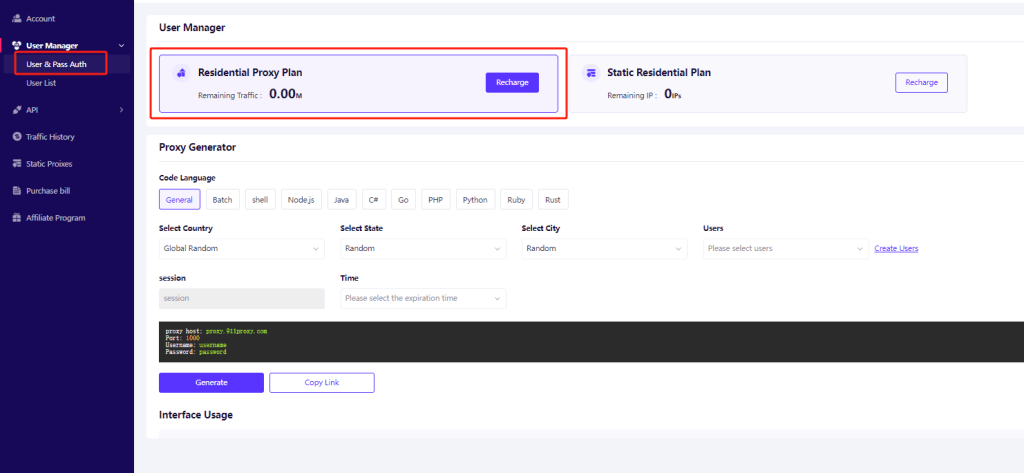
5. Select the country, state, city, user, and time, fill in the session, and click "Generate".
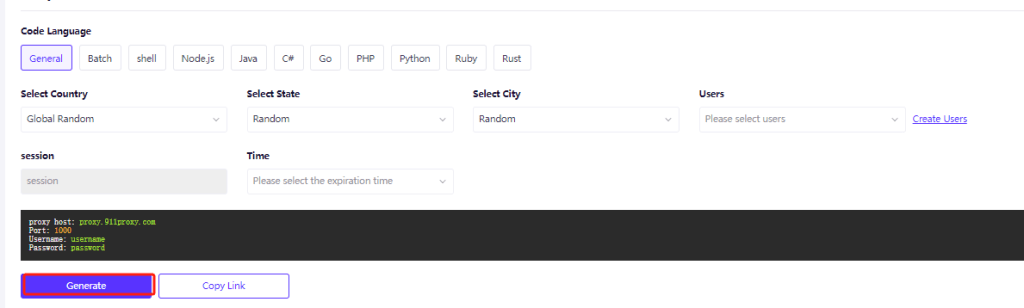
6. Then click the "Copy Link".
Step 2: Download and install VMLogin
1. Download and install VMLogin (New users can get a 3-day free trial).
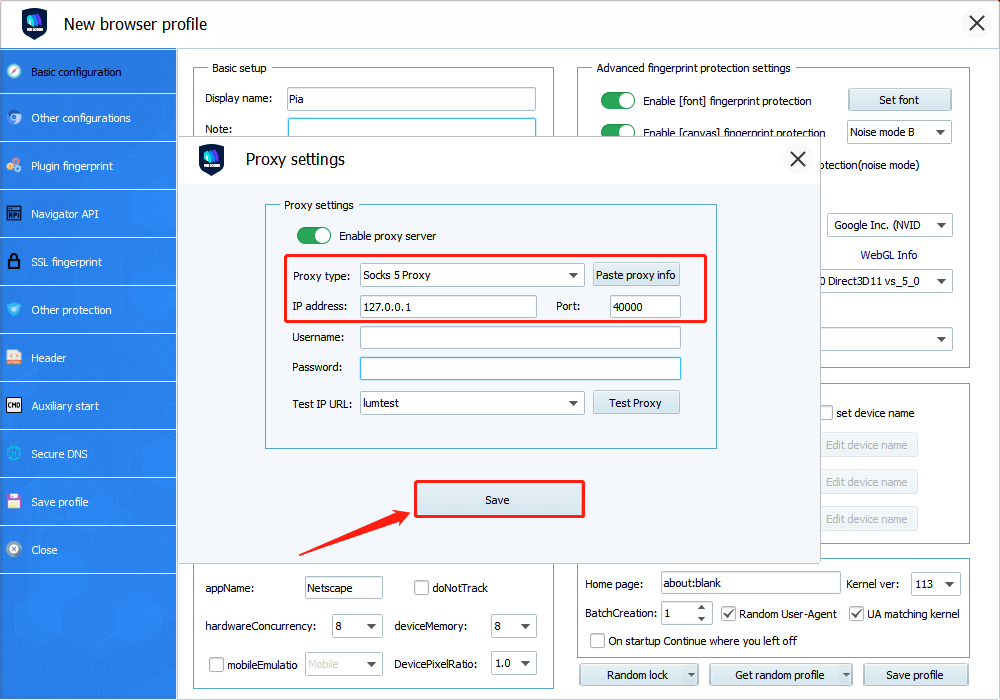
2. Log in to the VMLogin interface -> Click "New Browser profile" -> Find "Setting proxy server".

2. Open "Enable Proxy Server" -> Select "Socks5 Proxy" for proxy type -> Paste the proxy IP and port just copied, then click "Test Proxy" -> Finally click "Save", the proxy is successful!
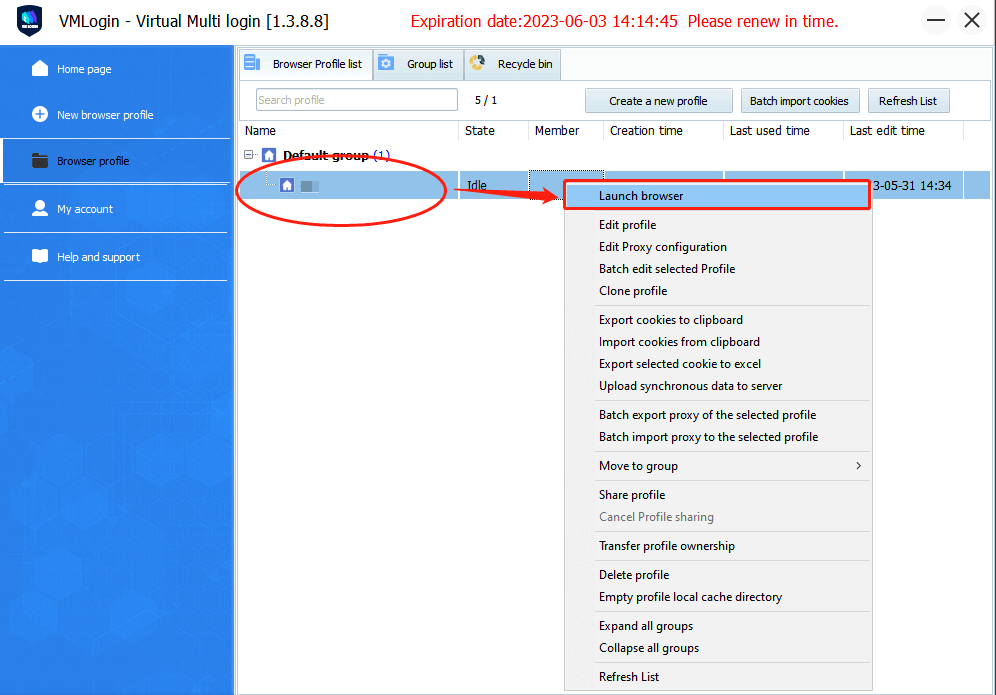
3. After saving, right-click the configured browser and click "Launch browser".
VMLogin browser software itself has no proxy IP service, users need to purchase proxy IP from a third party. Proxy-related tutorials are provided by third-party platforms and unrelated to the VMLogin. Users are strictly prohibited from using VMLogin to engage in any illegal and criminal activities, and users are responsible for the relevant responsibilities caused by using VMLogin.