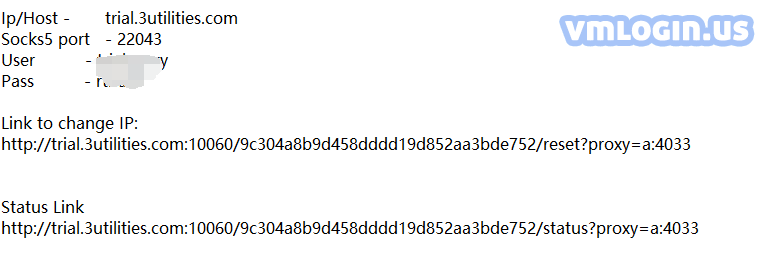
1. Log in to my4Gproxy official website, click "Pricing" to purchase a package. After the purchase is successful, the customer service will send the IP information, as shown below.

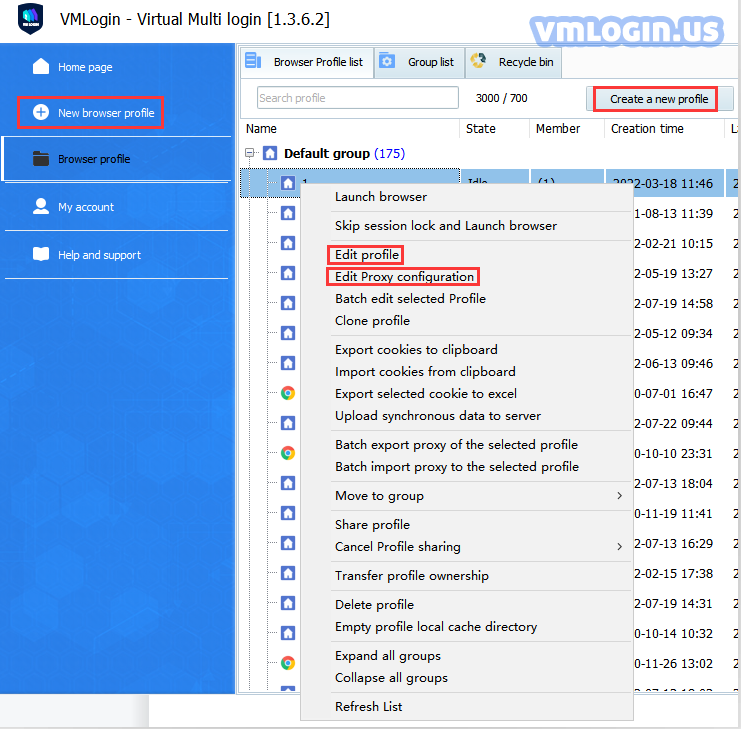
2. Open the VMLogin client. Click "New browser profile" or “Create a new profile”.
Set the proxy server or select the created profile in the "Browser profile" list, then right-click and select "Edit profile" or "Edit Proxy Configuration" to set the proxy IP;
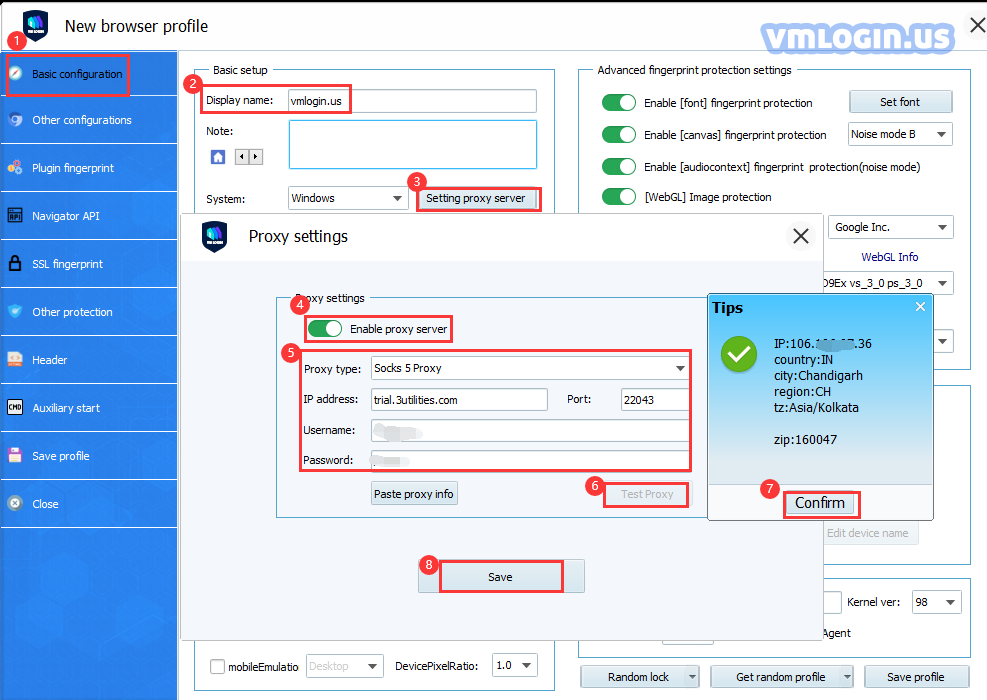
3. Open the "Enable Proxy Server" button.
4. Select the proxy type corresponding to the IP, such as HTTP, SOCKS5.
5. Select "Paste proxy information" or fill in proxy IP:port:login user:login password in sequence.
6. Click "Test Proxy", after the test is successful, click "Save" to save and then open the browser for use.
7. After filling in the IP information and saving it, open the IP Rotation Link, and the IP will be rotated every 5 minutes.

8. Open IP Status Link, it will display the current IP and the last IP.

VMLogin browser software itself has no proxy IP service, users need to purchase proxy IP from a third party. Proxy-related tutorials are provided by third-party platforms and are not related to the VMLogin. Users are strictly prohibited from using VMLogin to engage in any illegal and criminal activities, and users are responsible for the relevant responsibilities caused by using VMLogin.