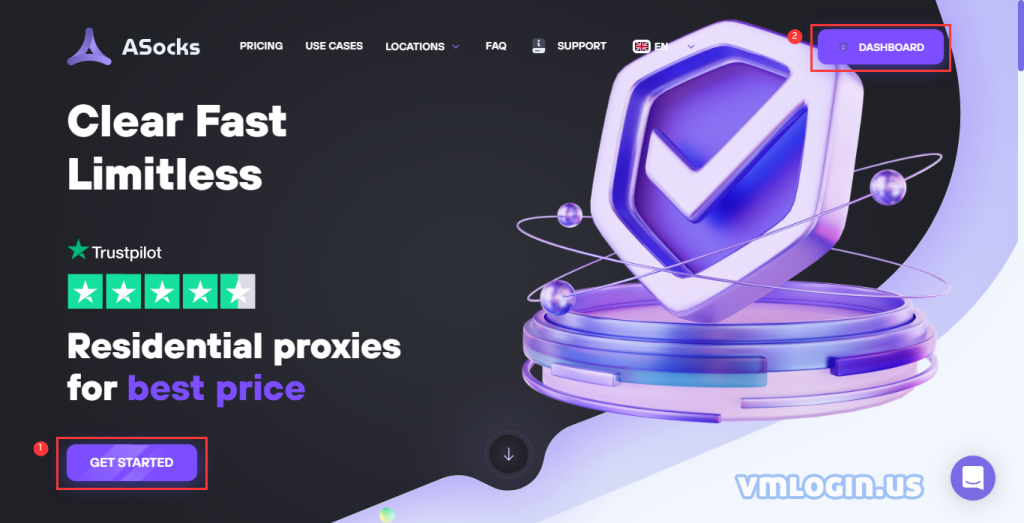
1. Open ASocks official website ( new users register through this link recharge for the first time can get additional 20% amount), click GET STARTED to register an account, click DASHBOARD to log in after registration.
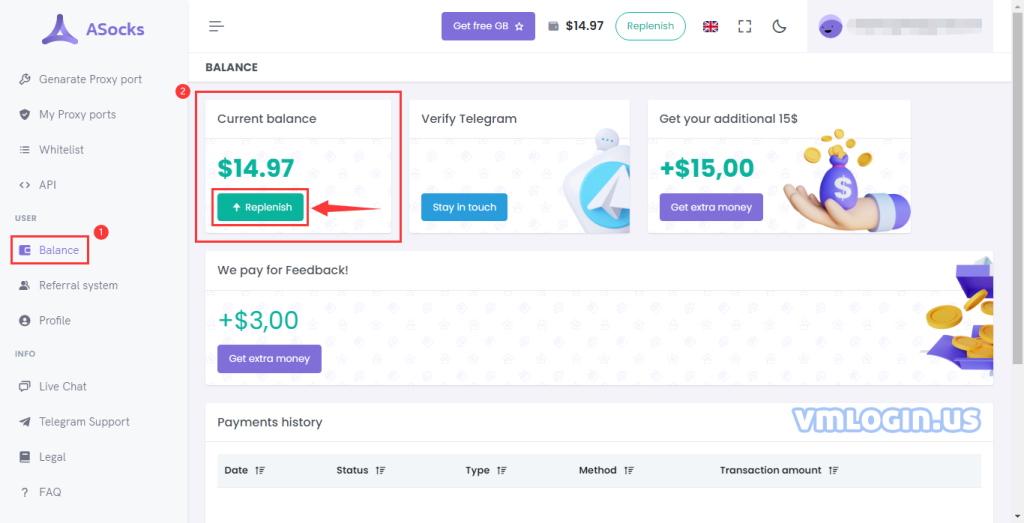
2. Click Balance. Click Replenish button in the Balance option to recharge. To ensure a stable connection, the balance should not be less than $0.50.
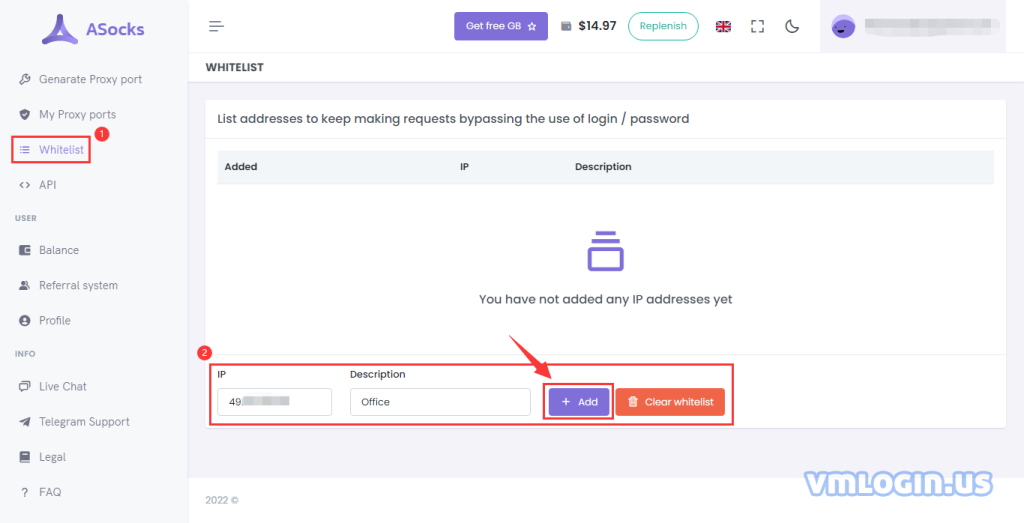
3. Click Whitelist and add your current IP address.
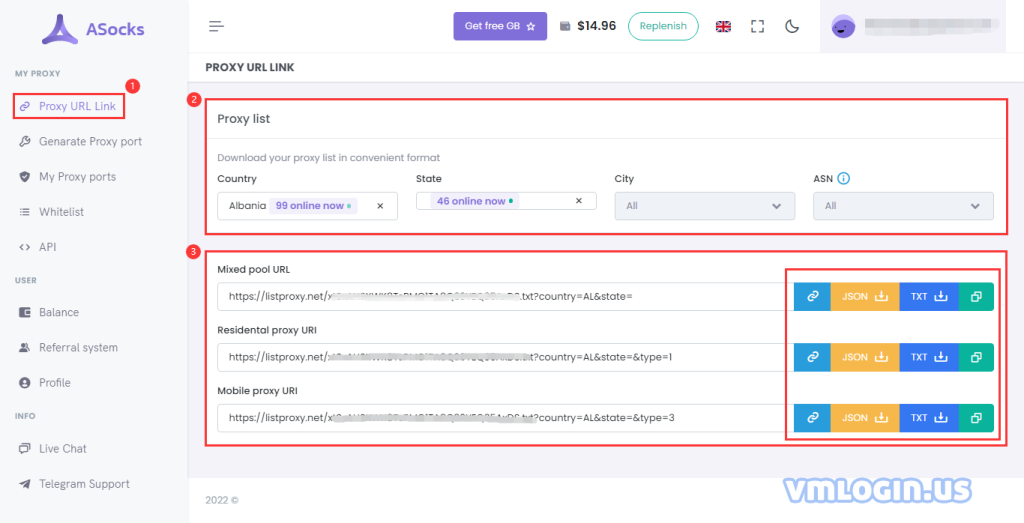
4. There are two ways to generate proxy IP:
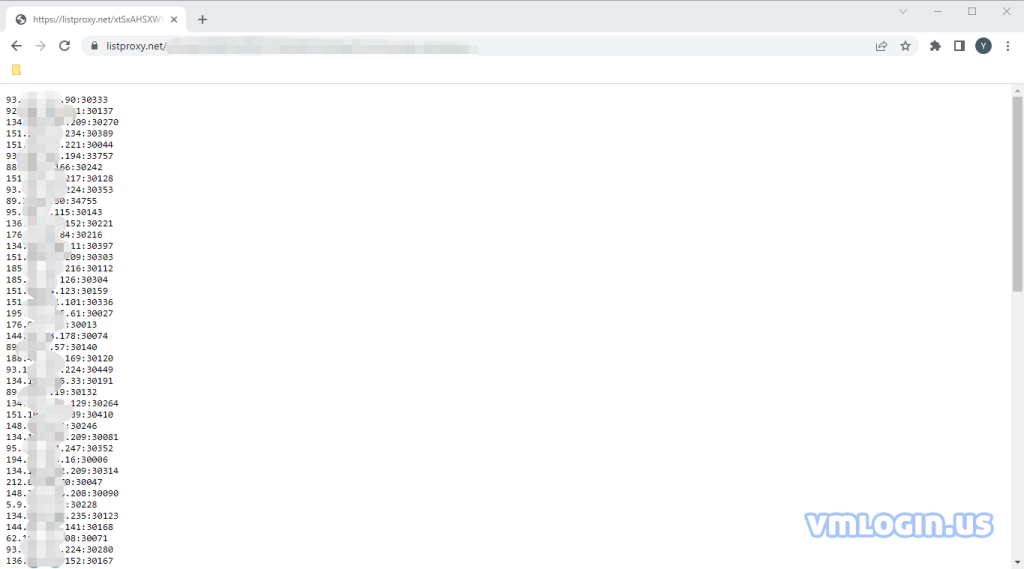
(1) Click Proxy URL Link to generate. This way generates IPs and ports, which can be used directly or imported in bulk. Select Country, State, City, and ASN (country must be selected, others are optional). URL links will be generated after selection. Click the button behind the link to open it in a new tab, download in JSON or TXT format, or copy the link.
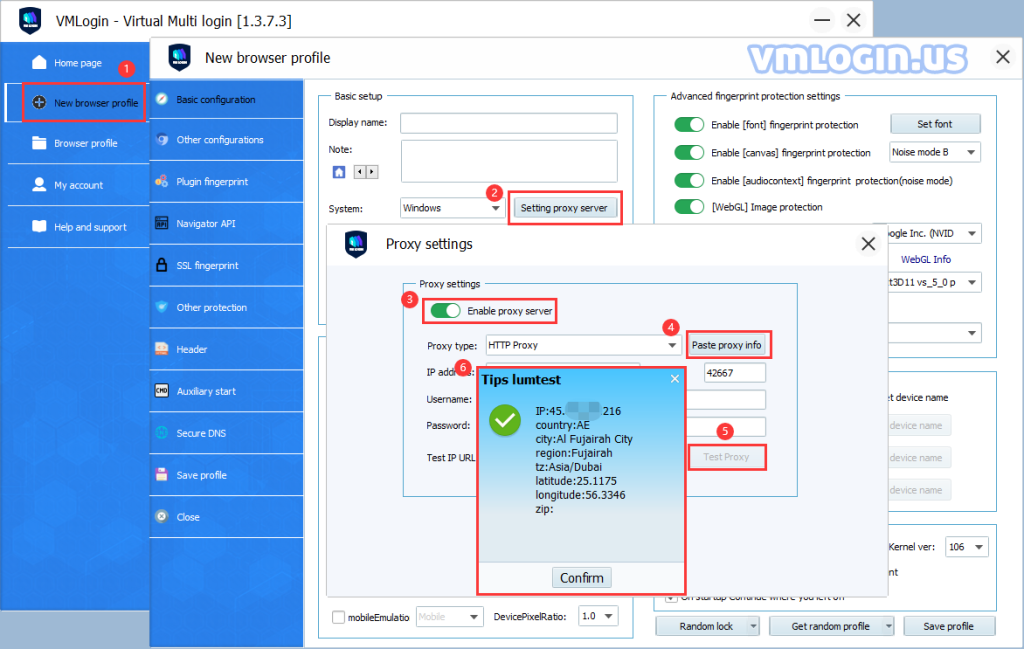
Open VMLogin Antidetect Browser. Click "New browser profile". Click "Setting proxy server". "Enable proxy server". Proxy type HTTP/SOCKS5/HTTPS is available. "Paste proxy info", click "Test Proxy", and save it after successful connection.
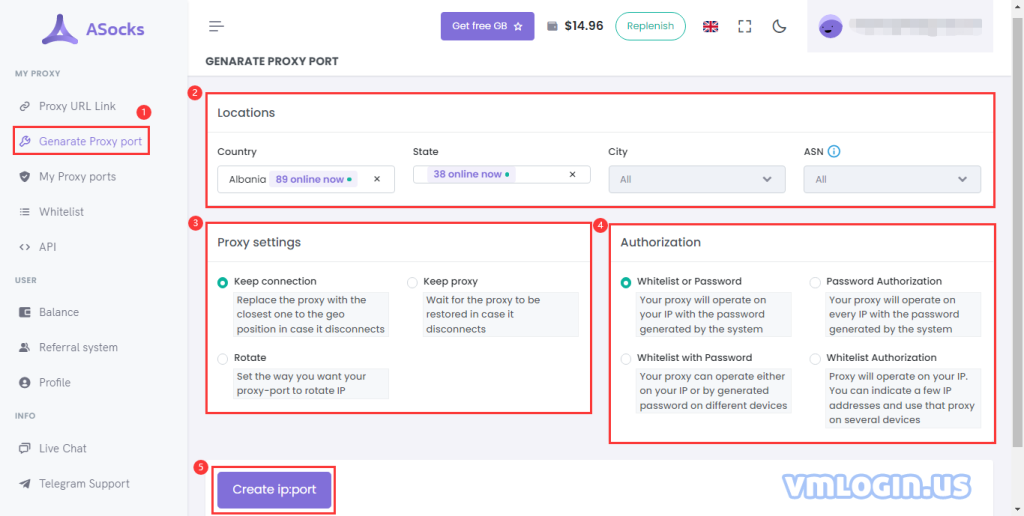
(2) Click Generate Proxy port. This method generates IP, port, account and password.
Locations: select country, state, city and ASN (ASN is an optional parameter to receive proxies from the preferred autonomous system).
Proxy settings:
①Keep connection: Replace the proxy with the closest one to the geoposition in case it disconnects.
②Keep proxy: Wait for the proxy to be restored in case it disconnects.
③Rotate: Set the way you want your proxy-port to rotate IP.
Authorization:
①Whitelist or Password: Your proxy will operate on your IP with the password generated by the system.
②Password Authorization: Your proxy will operate on every IP with the password generated by the system.
③Whitelist with Password: Your proxy can operate either on your IP by generated password on different devices.
④Whitelist Authorization: Proxy will operate on your IP. You can indicate a few IP address and use that proxy on several devices.
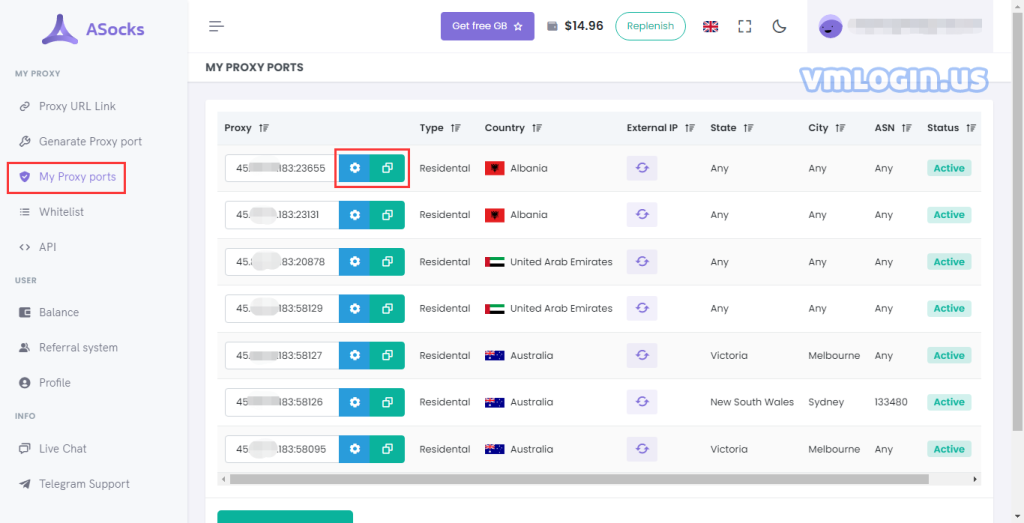
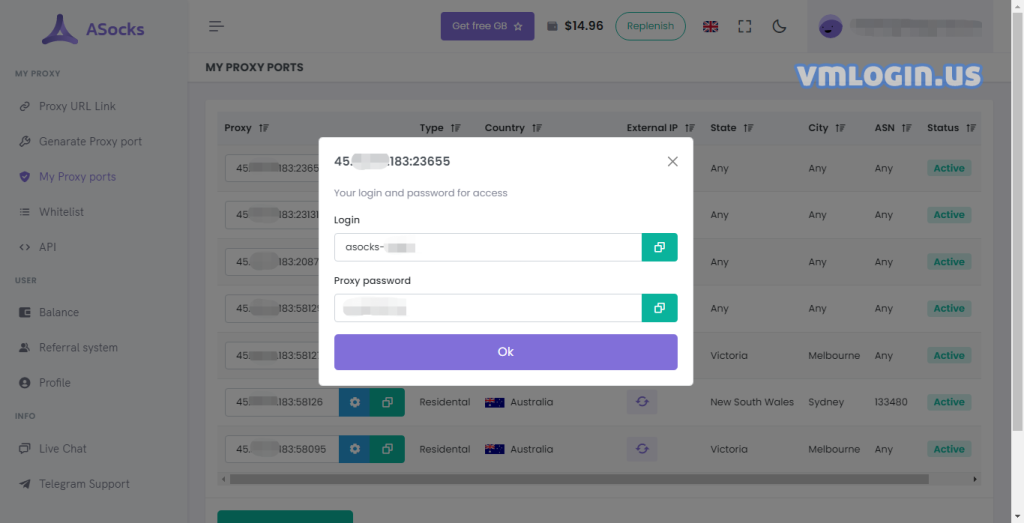
Click Create ip: port to generate, jump to My Proxy ports, you can view the generated IPs in the list. Click blue set button to view IP specific information, click green copy button to copy directly.
Open VMLogin Antidetect Browser. Click "New browser profile". Click "Setting proxy server". "Enable proxy server". Proxy type HTTP/SOCKS5/HTTPS is available. "Paste proxy info", click "Test Proxy", and save it after successful connection.

VMLogin browser software itself has no proxy IP service, users need to purchase proxy IP from a third party. Proxy-related tutorials are provided by third-party platforms and are not related to the VMLogin. Users are strictly prohibited from using VMLogin to engage in any illegal and criminal activities, and users are responsible for the relevant responsibilities caused by using VMLogin.