Create Your Proxy Subscription:
1. Open the PrivateProxy.me site and log in or create a new account.
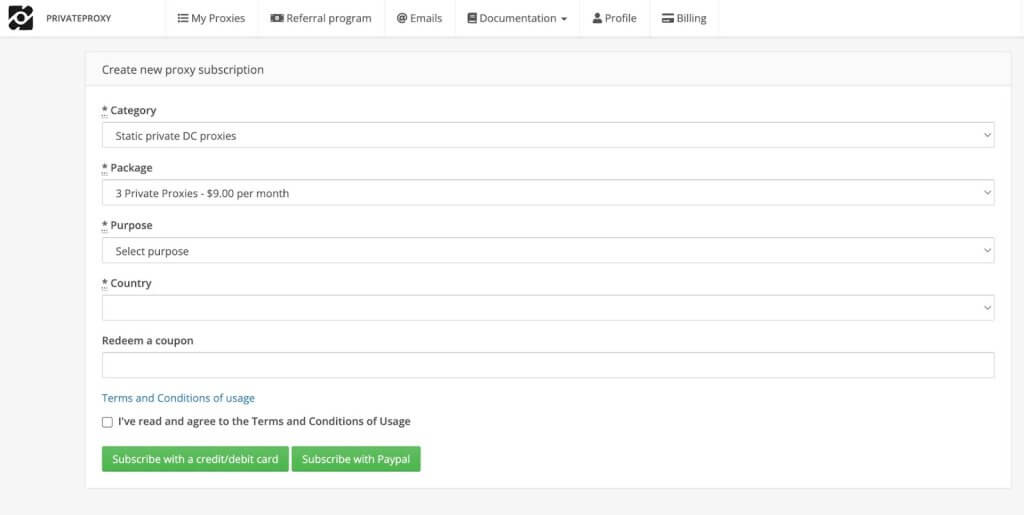
2. Now click on the "Buy proxies" button and choose any type you need. You can also adjust the country, package, and other options in this step.
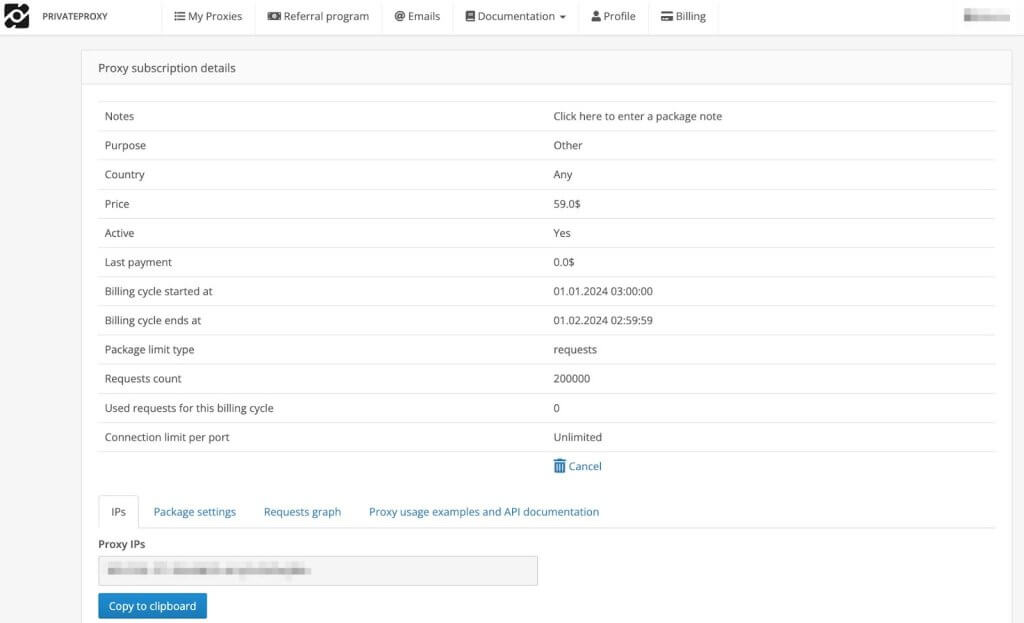
3. Then you need to find your proxy credentials on the "My Proxies" tab. These credentials are needed for further steps.
(1) Your active subscription will show the billing cycle's price, start and end date, and package limit type (e.g., requests).
(2) Take note of the "Proxy IPs" section where your allocated IP addresses are listed.
Setting Up Proxies in VMLogin Browser:
Now that we have all the needed credentials, we can start using our proxies in the VMLogin browser.
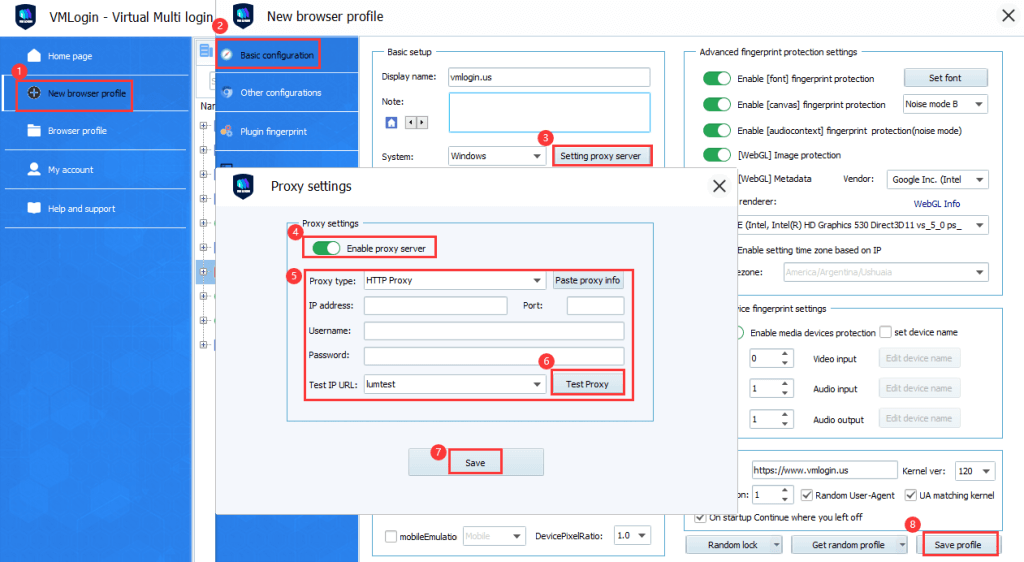
1. First, you need to download the VMLogin Browser and add a new profile. Then choose proxy setup and enable the proxy button.
2. Here you can add a username, password, IP address, and port for connection.
3. After this, choose the "Test Proxy" button and save the settings.
In the same way, you can add a proxy to an already existing browser profile.
1. Choose an existing profile and find the "Edit Proxy configuration" button. Here, you can enable a proxy server for this profile.
2. Now add all the data needed for connection and test the final proxy setup. If everything works as planned, you can press the save button.
3. Now you can start using the VMLogin browser profile with your proxy setup.
Note: VMLogin browser software itself has no proxy IP service, users need to purchase proxy IP from a third party. Proxy-related tutorials are provided by third-party platforms and unrelated to the VMLogin. Users are strictly prohibited from using VMLogin to engage in any illegal and criminal activities, and users are responsible for the relevant responsibilities caused by using VMLogin.