Step 1. Get Apollo Proxy
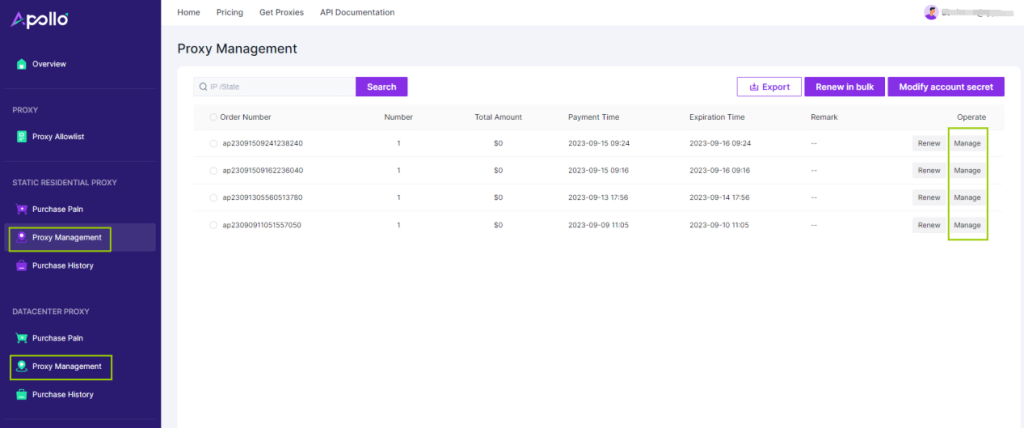
Register and log into your Apollo Proxy account and go to Static Residential Proxy/Data Center Proxy "Proxy Management". Here you will see the agent package you have purchased. Click on Manage and you will see the agent details, keep this window open and proceed to the next step.

Step 2. Create a new configuration file and add Apollo Proxy
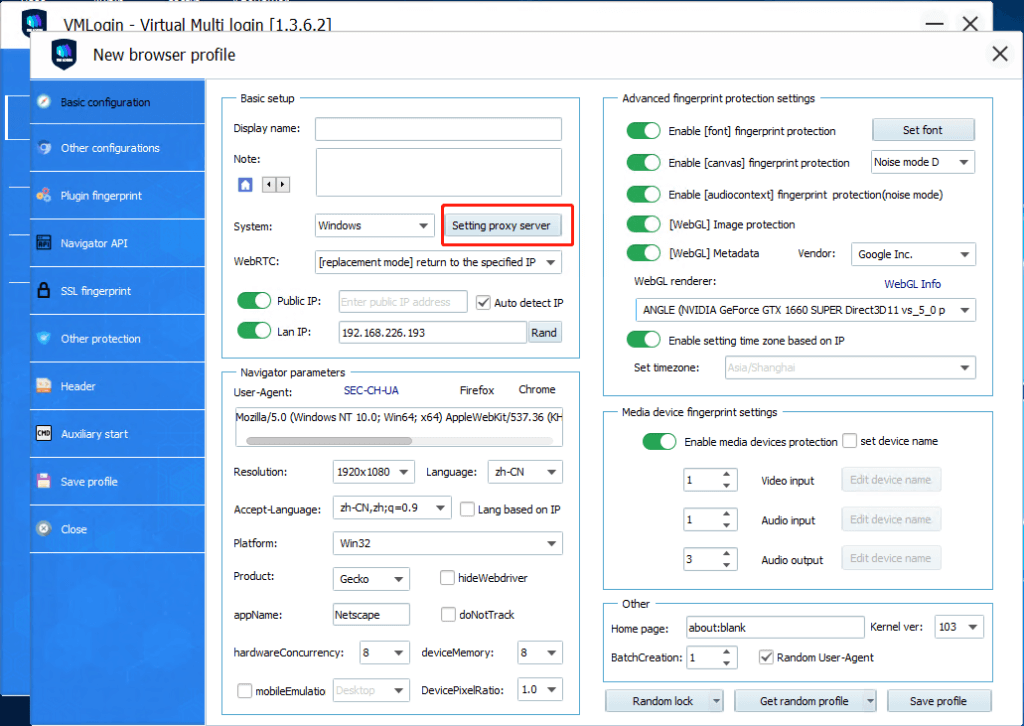
1. Open the VMLogin client and click "Create a new Profile" to create a configuration file, and then click "Setting proxy server". (New users can get 3 days free trial)
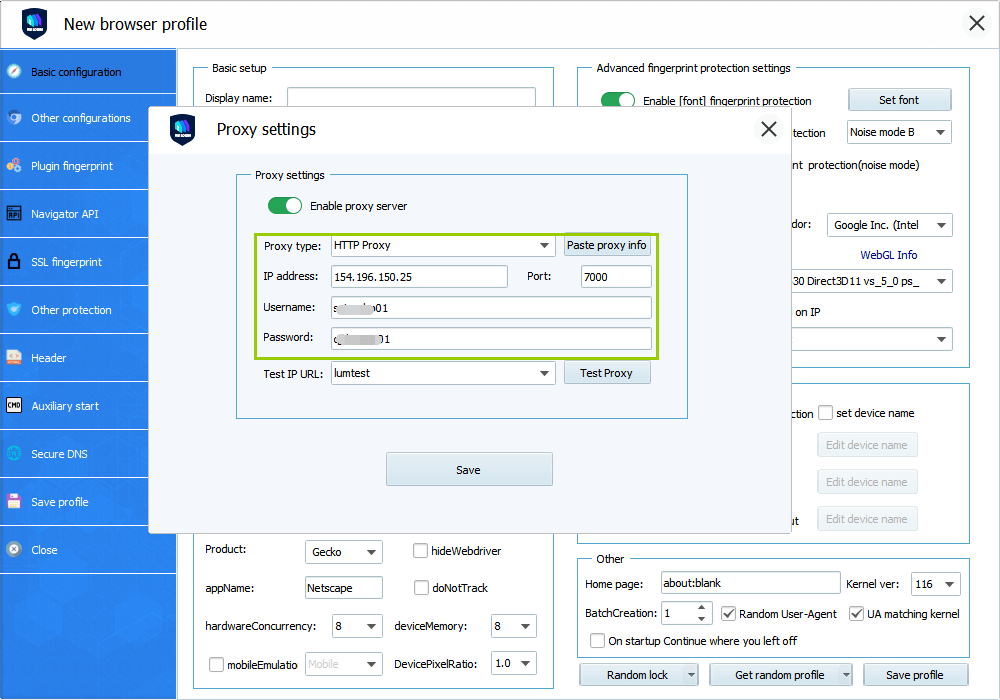
2. Copy the Apollo proxy account, proxy password, proxy host, and proxy port information, and then fill in the proxy settings in VMLOGIN.
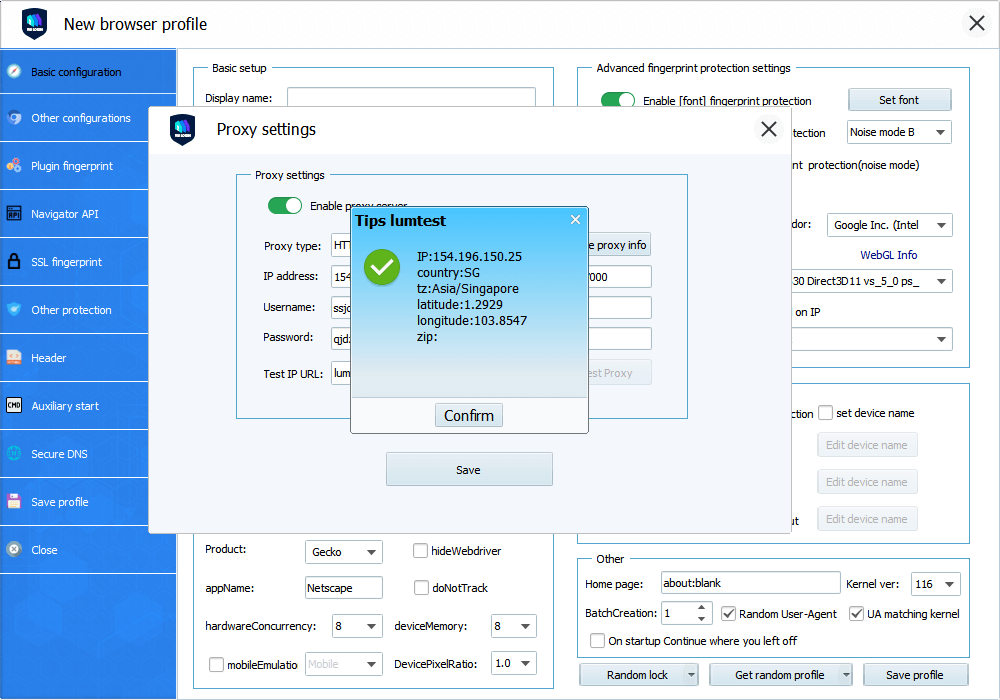
3. Click "Test Proxy", confirm and save.
VMLogin browser software itself has no proxy IP service, users need to purchase proxy IP from a third party. Proxy-related tutorials are provided by third-party platforms and are not related to the VMLogin. Users are strictly prohibited from using VMLogin to engage in any illegal and criminal activities, and users are responsible for the relevant responsibilities caused by using VMLogin.