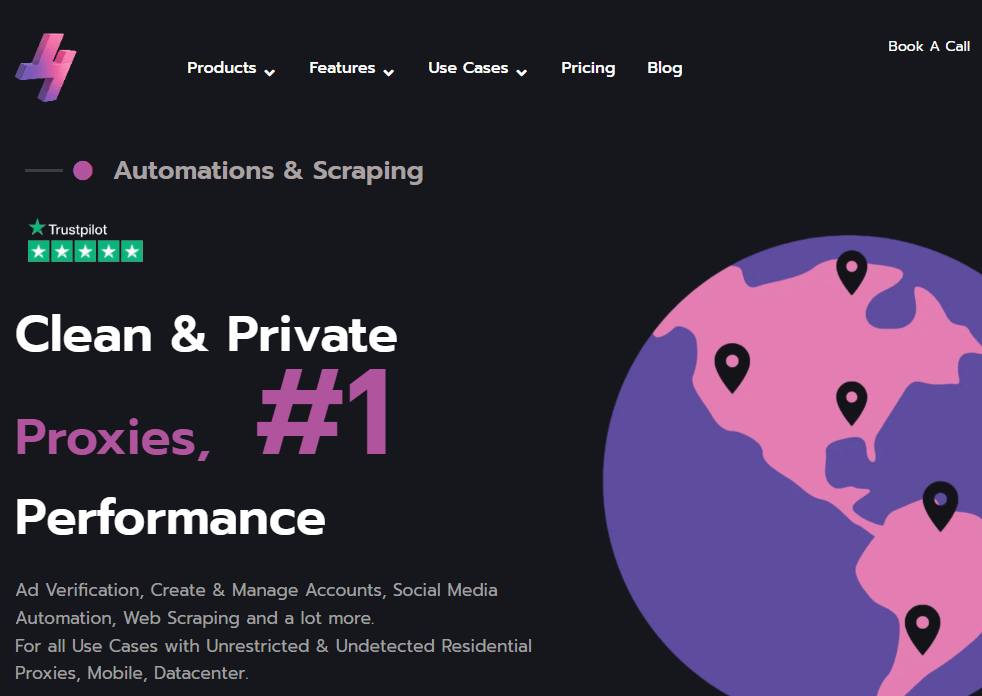
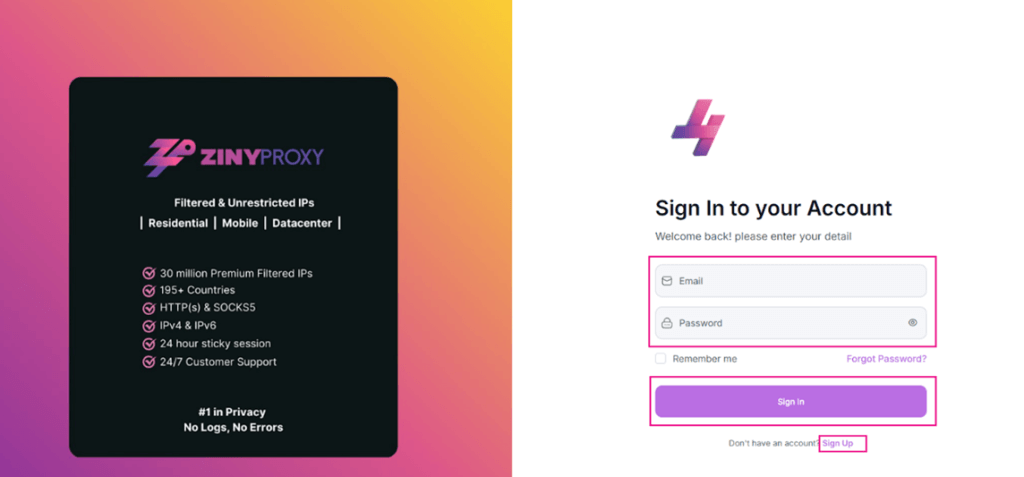
Step 1: Visit Ziny Proxy website and click on the Login/SignUp button.
Step 2: Create an Account by Signing Up if this is your first time on this highly recommended proxy provider, if already a customer you can simply Login on your dashboard.
Step 3: Under the “Purchase Plan” Tab, you can buy a Plan (Support Trial).
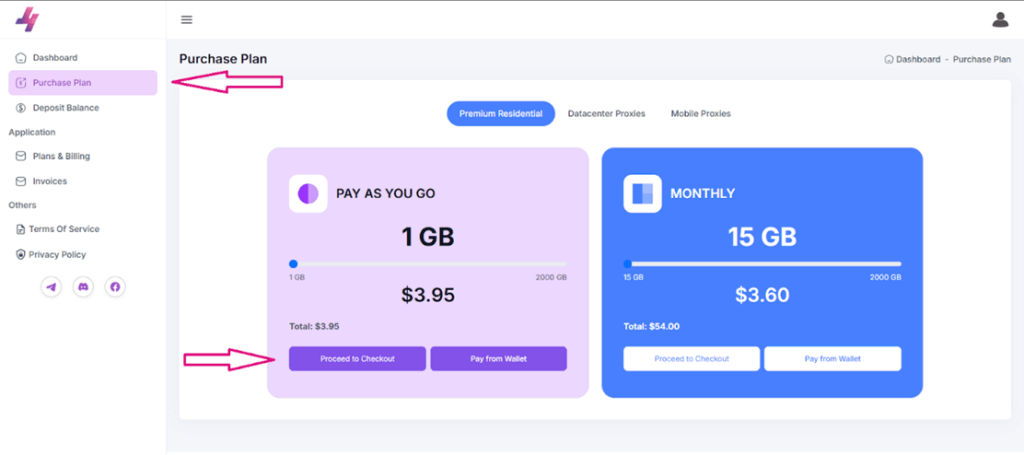
Step 4: Select the Proxy Plan you are interested in and access the Endpoint/Proxy Generator and select the specifications you need.

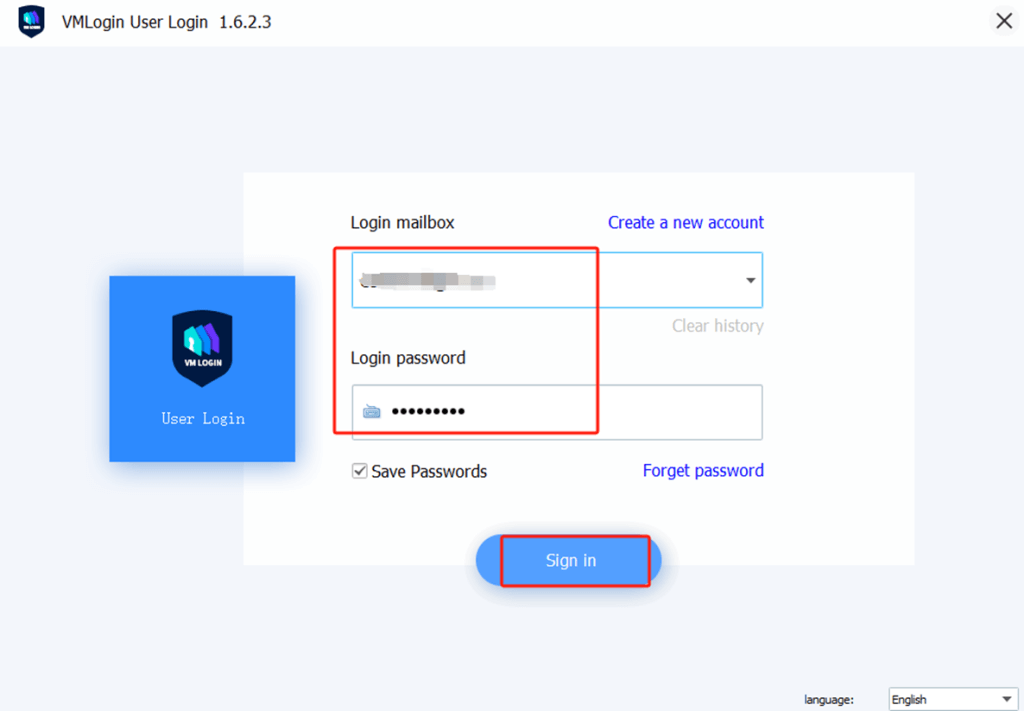
Step 5: Launch the VMLogin and log in to your account (Support 3-day Free Trial).
Step 6: Create a New Browser Profile and Set the Proxy IP.
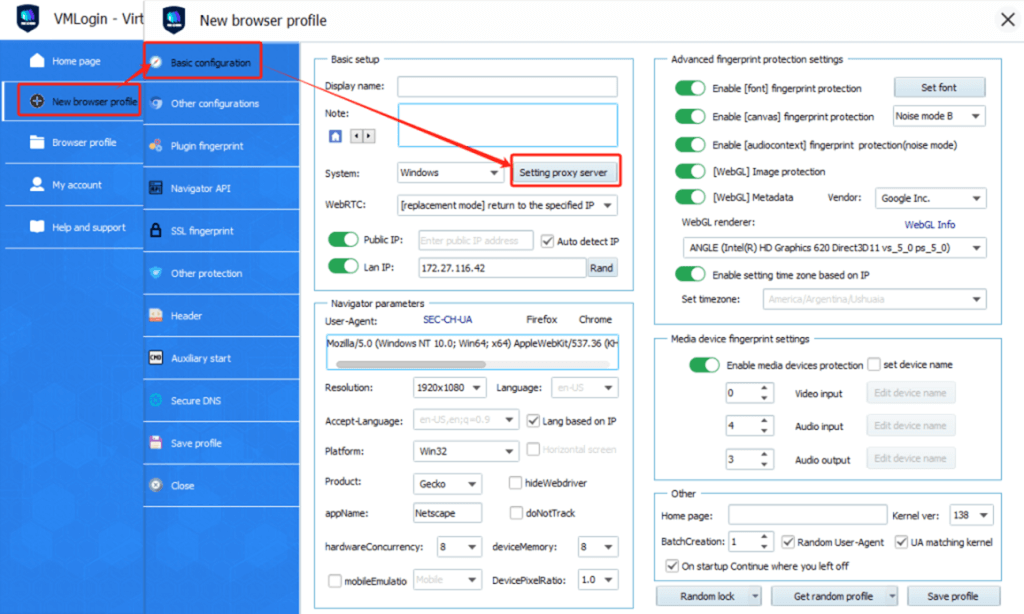
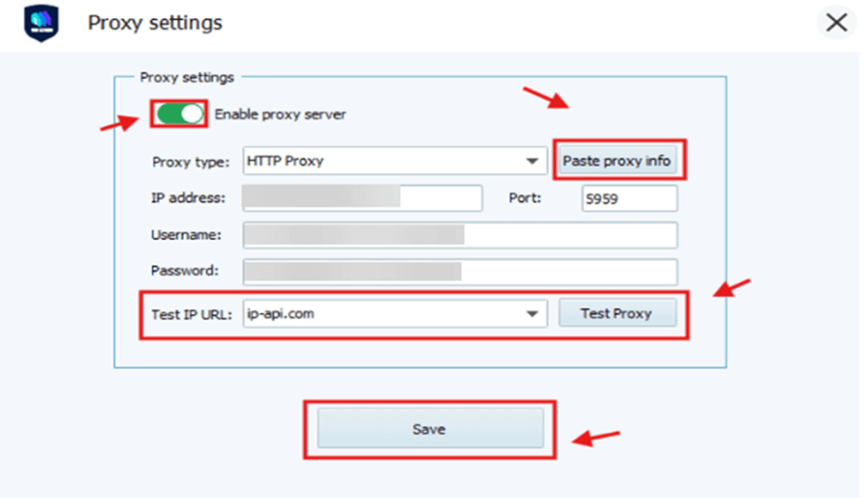
Step 7: Paste Proxy in VMLogin and Test
- First, toggle Enable the proxy server to ON.
- Then, click "Paste proxy info" – VMLogin will automatically fill in the IP, port, username, and password.
- In the Test IP URL field, enter `ip-api.com`.
- Click Test Proxy to verify the connection.
Step 8: Save and Launch the profile.

Note: VMLogin browser software itself has no proxy IP service, users need to purchase proxy IP from a third party. Proxy-related tutorials are provided by third-party platforms and unrelated to the VMLogin. Users are strictly prohibited from using VMLogin to engage in any illegal and criminal activities, and users are responsible for the relevant responsibilities caused by using VMLogin.