Step 1: Generate a Proxy from FleetProxy Dashboard
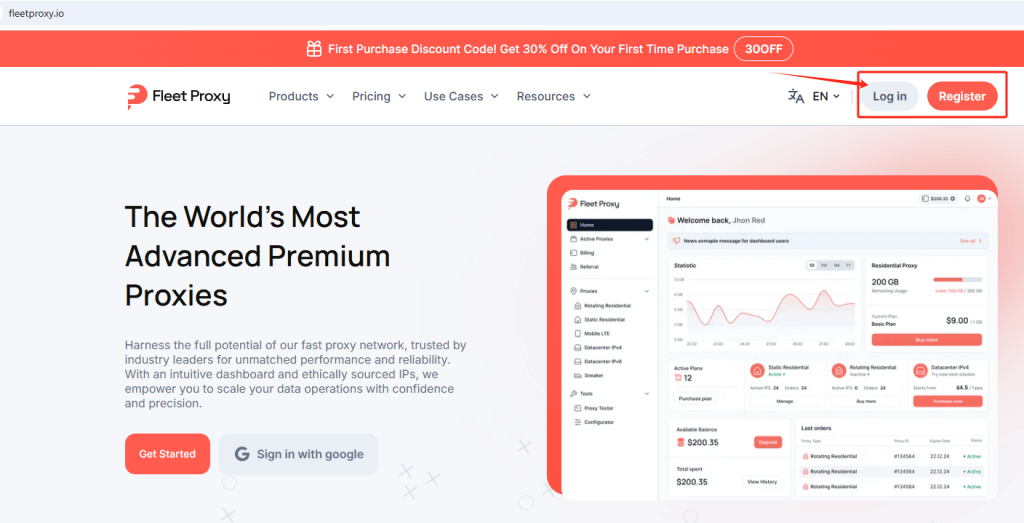
Log in to your FleetProxy dashboard and navigate to Rotating Residential from the sidebar. Under the Generator tab, choose your preferred: (Get 30% Off On Your First Time Purchase. Code: 30OFF)
- Country and State
- Protocol (HTTP / HTTPS or SOCKS5)
- Rotation type (Randomize IP or Sticky IP)
Once done, the complete proxy string will appear in the right-hand box; click the copy icon to copy it. Click the copy icon to copy the full proxy string. FleetProxy’s generator tool allows full control over proxy location and behaviour, ideal for users managing ad verification, SEO tracking, or anti-detection browsing. Whether you're working on stealth marketing or automation, these rotating IPs help you stay completely anonymous.
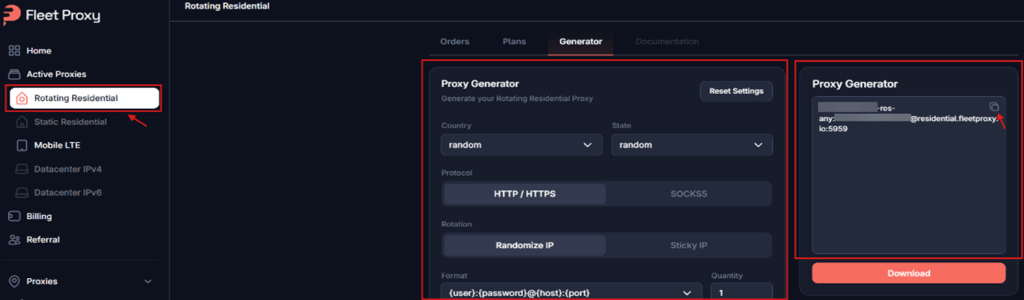
Now, let’s copy and paste the credentials to VMLogin.
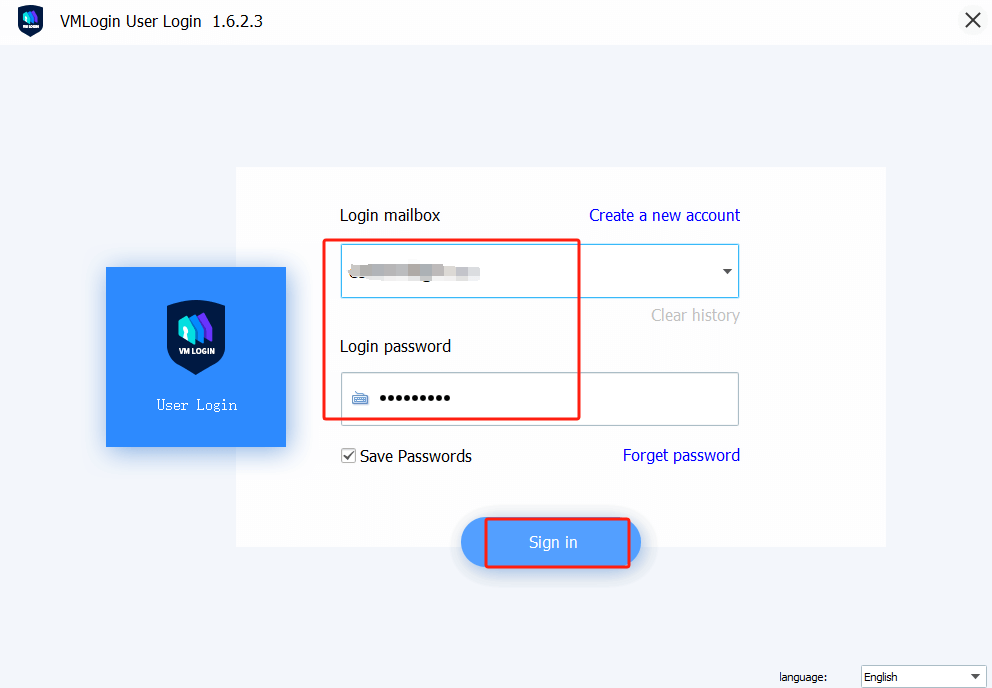
Step 2: Launch the VMLogin and log in to your account (Support 3-day Free Trial).
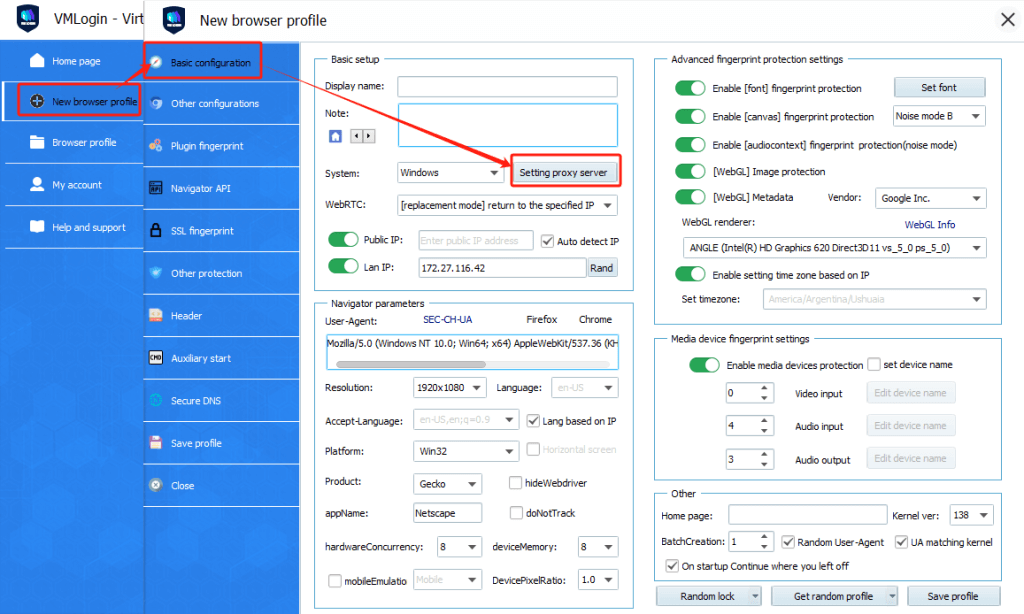
Step 3: Create a New Browser Profile and Set the Proxy IP.
Step 4: Paste Proxy in VMLogin and Test
- First, toggle Enable the proxy server to ON.
- Then, click "Paste proxy info" – VMLogin will automatically fill in the IP, port, username, and password.
- In the Test IP URL field, enter `ip-api.com`.
- Click Test Proxy to verify the connection.
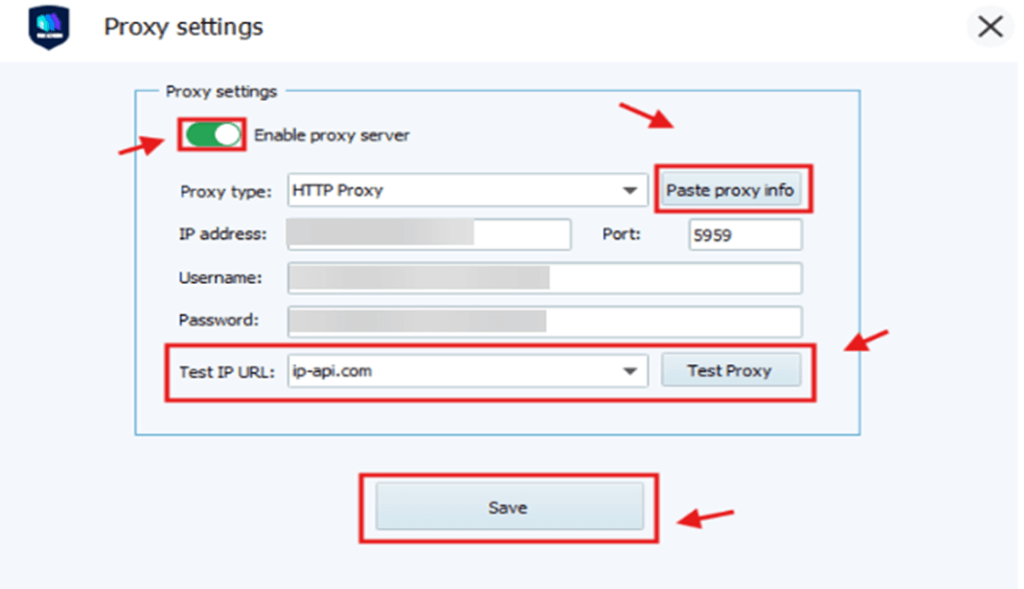
If the proxy is set up correctly, you’ll see a success message with the new IP and location. Click "Confirm" and then "Save" to store the settings.

Step 5: Save the Profile
After saving your proxy settings, return to the Basic Configuration panel.
Give your browser profile a name (e.g., "FleetProxy"), review the remaining browser and fingerprint protection settings, and then scroll down to click "Save profile" at the bottom.
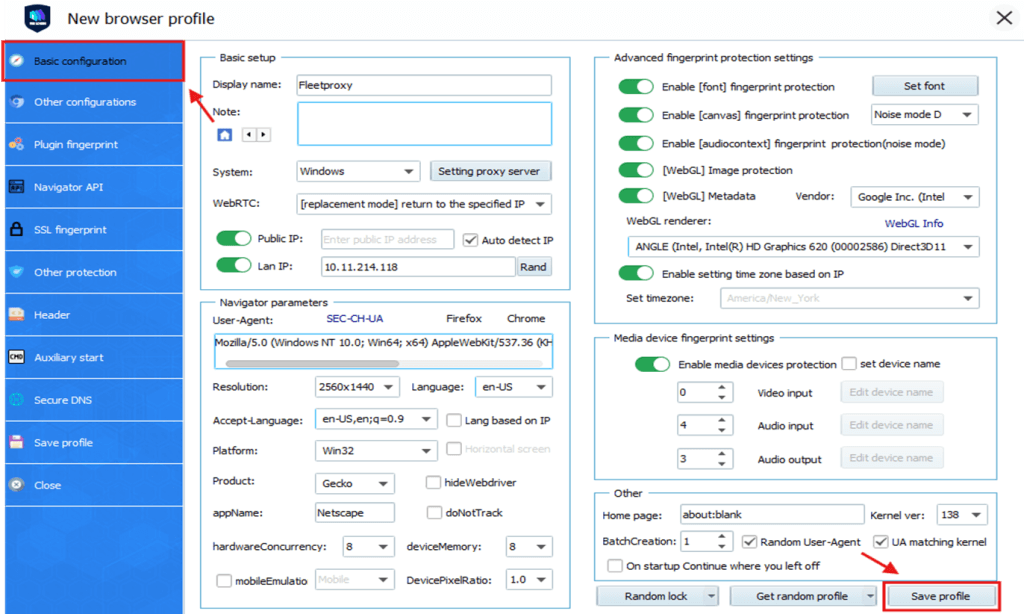
Your new profile with proxy integration is now ready.
Step 7: Launch the Profile
Now go to Browser Profile in the left menu. Locate the profile you just created, right-click on it, and select "Launch browser" from the menu.
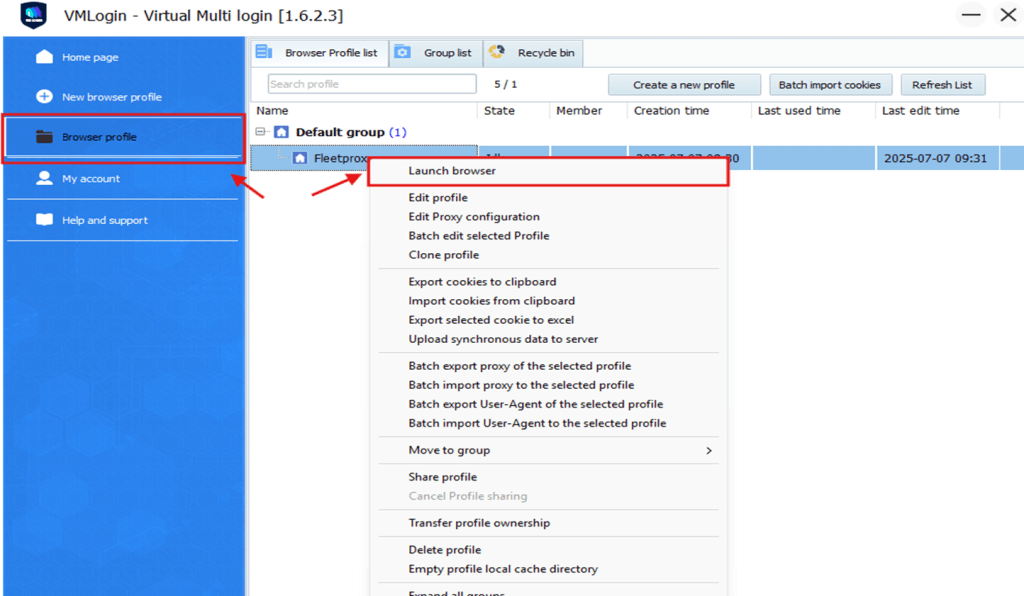
This will launch a new browser instance using the custom fingerprint and proxy you’ve set.
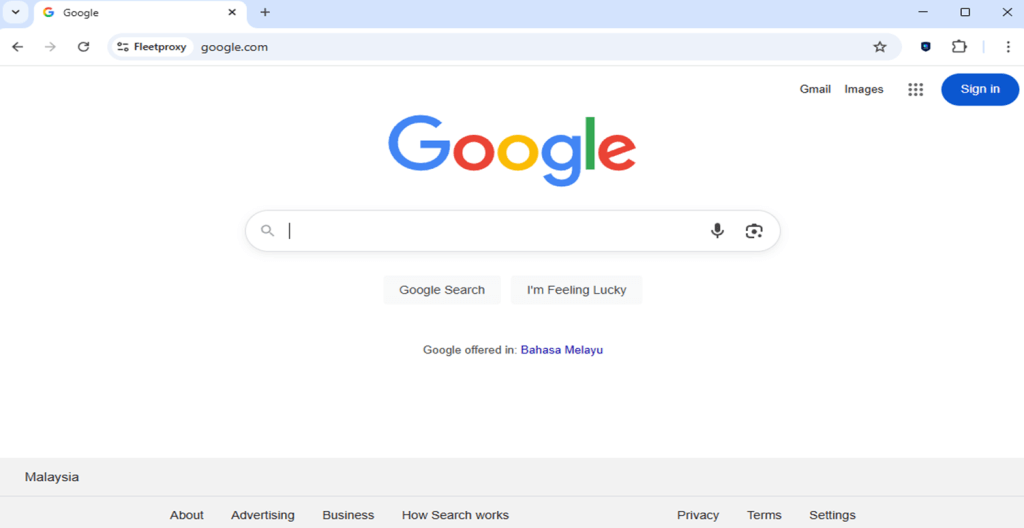
Step 8: Confirm Proxy Location (Optional)
To confirm everything is working properly, visit a website like google.com or iplocation.net from your launched profile. In our case, the browser successfully opened Google and showed the location as Malaysia, confirming the proxy is active.
Note: VMLogin browser software itself has no proxy IP service, users need to purchase proxy IP from a third party. Proxy-related tutorials are provided by third-party platforms and unrelated to the VMLogin. Users are strictly prohibited from using VMLogin to engage in any illegal and criminal activities, and users are responsible for the relevant responsibilities caused by using VMLogin.