Set Up Your Proxy Port and Get Credentials
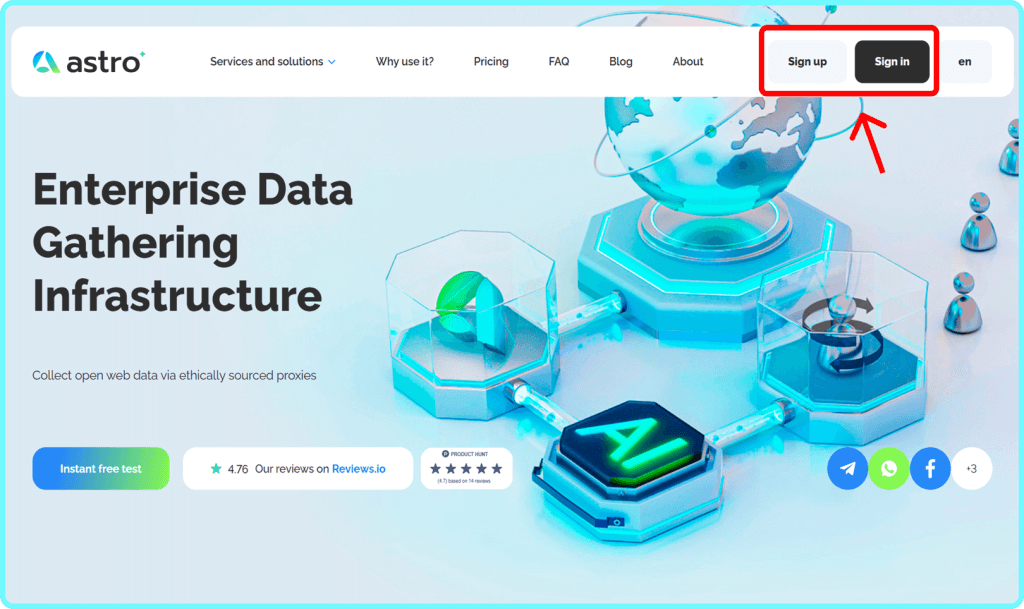
1. Sign Up and Access Astro Dashboard: Click Sign up (for new users) or Sign in (if you already have an account). Users who want to try proxies for free before purchase can follow the instructions provided by Astro to get test credits.
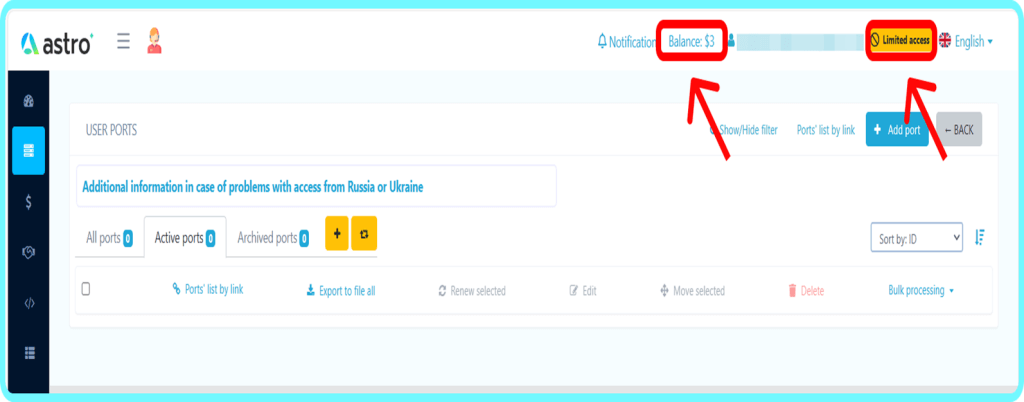
2. After activation, you will see a $3 trial balance on your account. This unlocks all core features for testing: all geolocations, API methods, TLS encryption, TCP tunneling, and more — everything needed for full-fledged work. If you need more resources, check your account balance in the top right corner. You can top up with a bank card right away, and with cryptocurrency after verification.
Next, click “Limited access” to start account verification. This KYC check is mandatory before creating proxy ports and ensures Astro remains a safe, transparent, and ethical proxy provider.
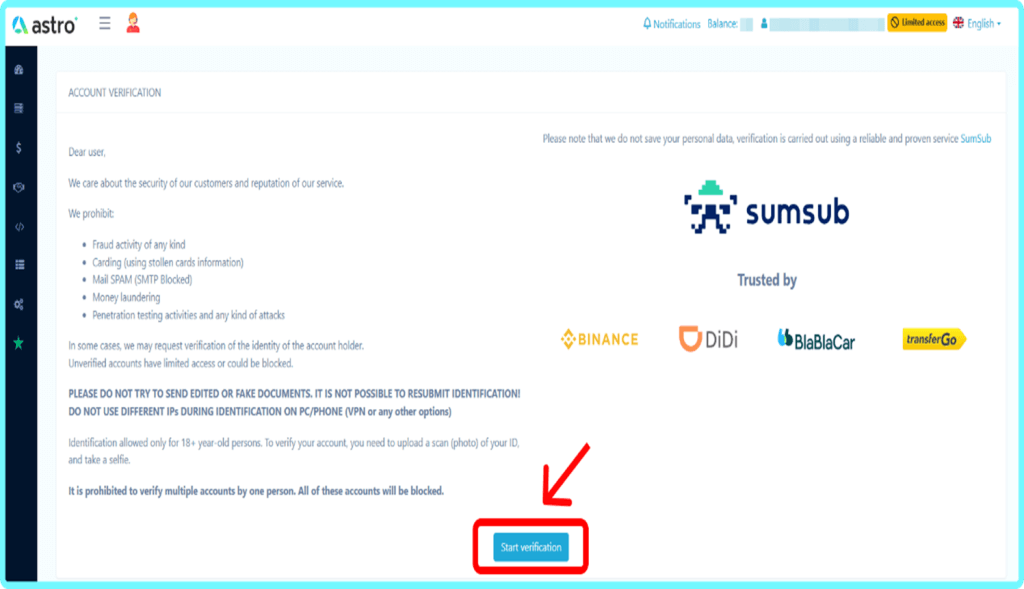
3. You will be redirected to the KYC verification window — here just click “Start verification” and follow the simple steps. The verification process uses a trusted provider and completes quickly. Astro is an ethical proxy provider that collects IPs and works under KYC/AML rules. Verification helps protect users, ensures responsible and reliable proxy sourcing, and is required before you can create active ports.
4. Once verification is complete, return to the My Proxies tab and click “Add port” to create your proxy.
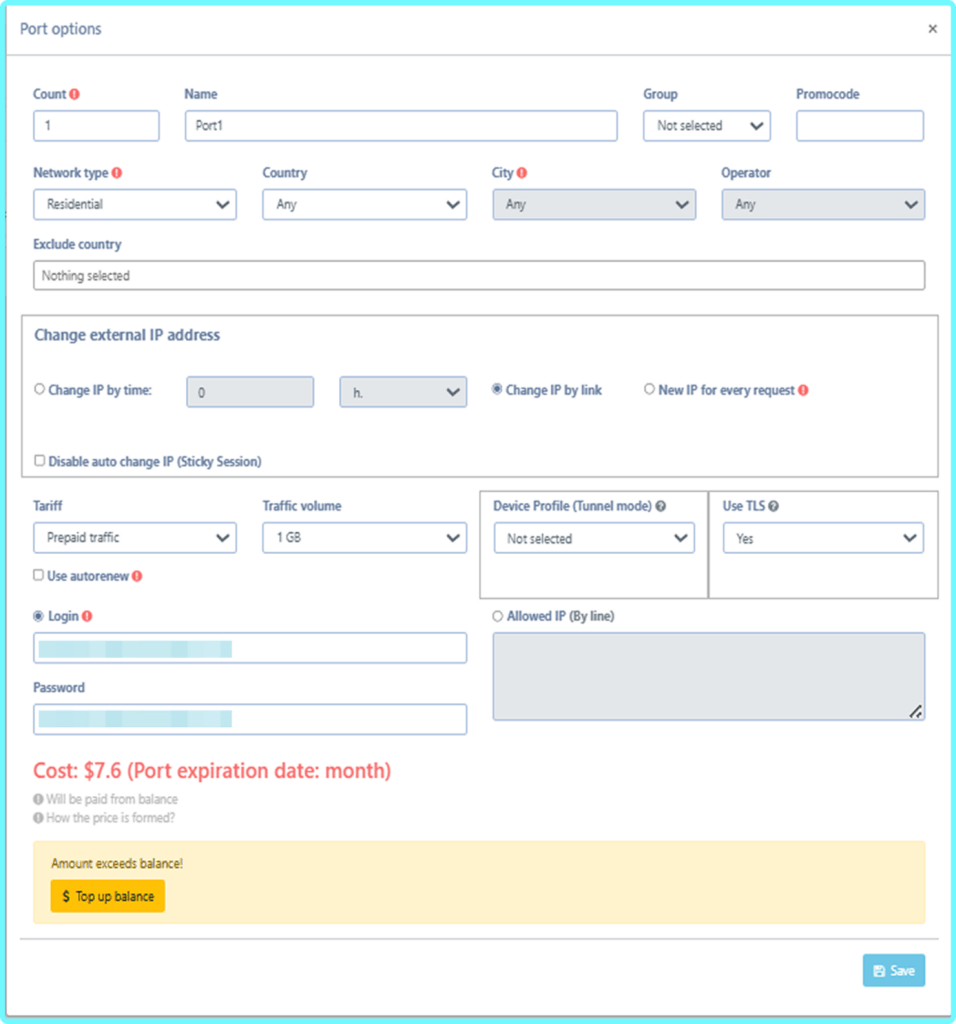
5. In the port settings window, choose the “Network type” (Residential, Mobile, or Datacenter) and set the “Location” (Country, and City/Operator if needed). Then configure “IP rotation” and select your “Authentication method” — either set a “Login/Password” to use in VMLogin or add your device’s IP under “Allowed IP” for whitelist access. Finally, select your “Traffic plan” — you can choose Pay As You Go, where you only pay for the data you actually use (no minimum), or Prepaid, where you purchase a fixed traffic package in advance at a discounted per-GB rate.
When to use which:
• Pay As You Go is ideal for tests, small workloads, or uncertain usage — you never lose anything.
• Prepaid makes sense for steady, predictable traffic volumes — you get lower rates and more control over costs.
Make sure your account balance covers the plan you pick, then click “Save” — your new proxy port is ready. If you need more detail about options, check the Astro FAQ or contact Astro support.
Astro proxies support both HTTP(S) and SOCKS5 protocols. Each created port can be used with either option — Astro provides separate port numbers for them. Decide which one you will use in VMLogin depending on your needs.
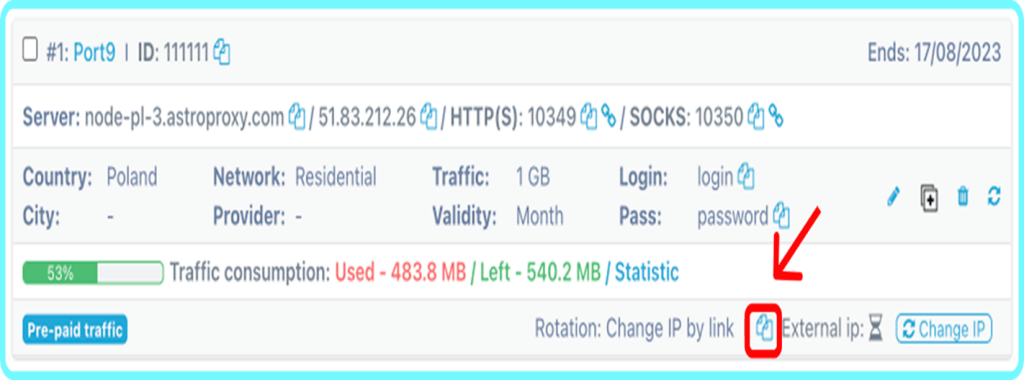
6. In the “Active Ports” list, select your port and use the copy button at the bottom right — this instantly provides your connection data (Host, Port, Username, Password). The values are given in a standard format:
ip:port:login:password
These credentials are what you will later enter into VMLogin when configuring your proxy.
Configuring Astro in VMLogin
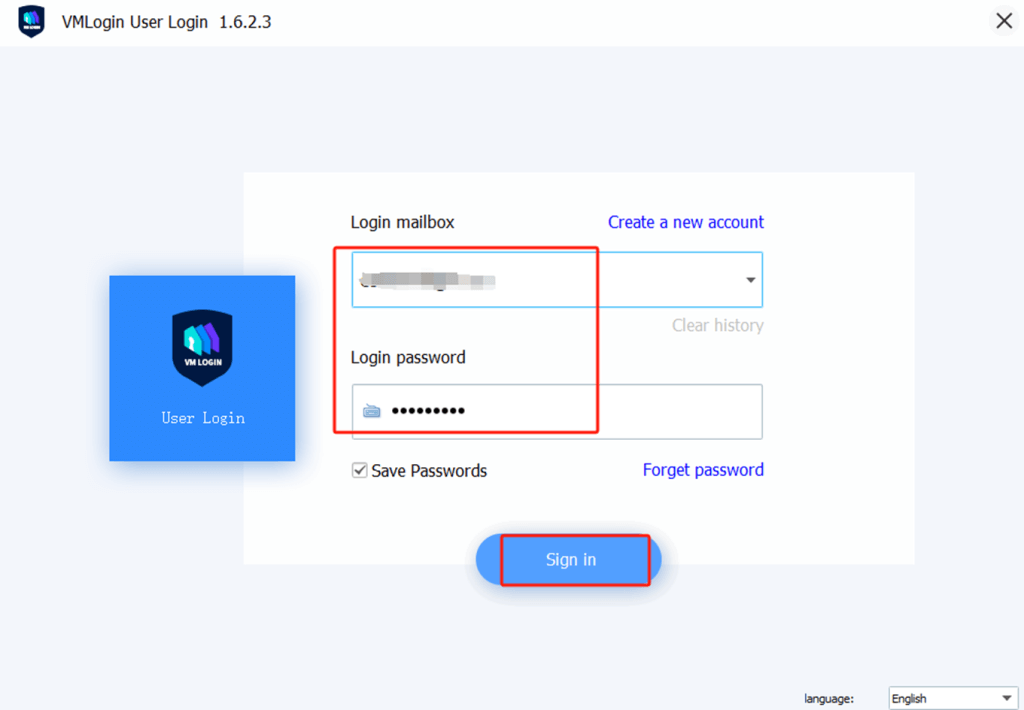
- Download and install VMLogin (Support 3-day Free Trial).
- Launch the VMLogin client and log in to your account.
3. Create a New Browser Profile and Set the Proxy IP.
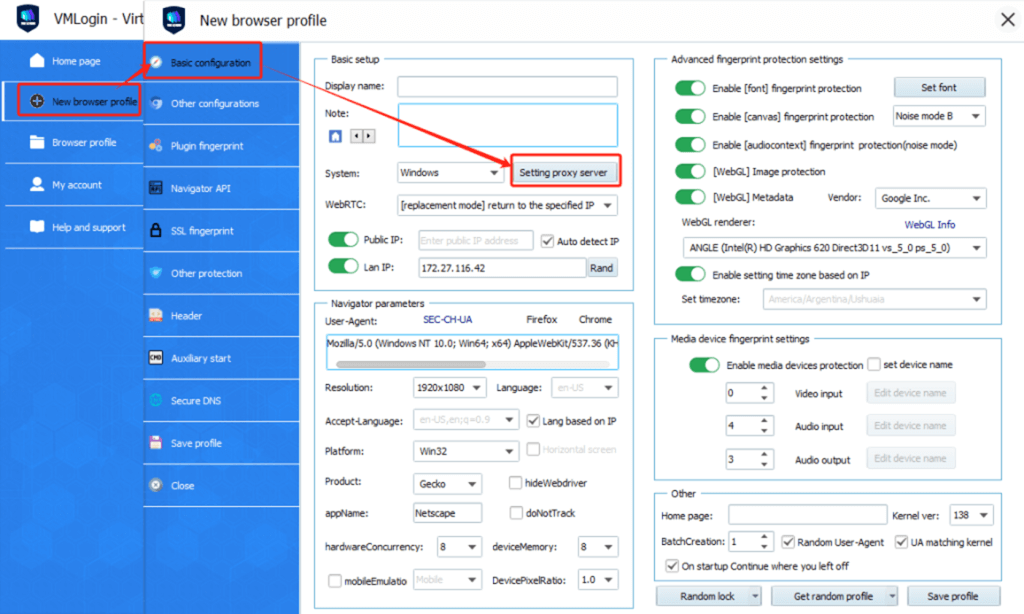
4. Paste Proxy in VMLogin and Test
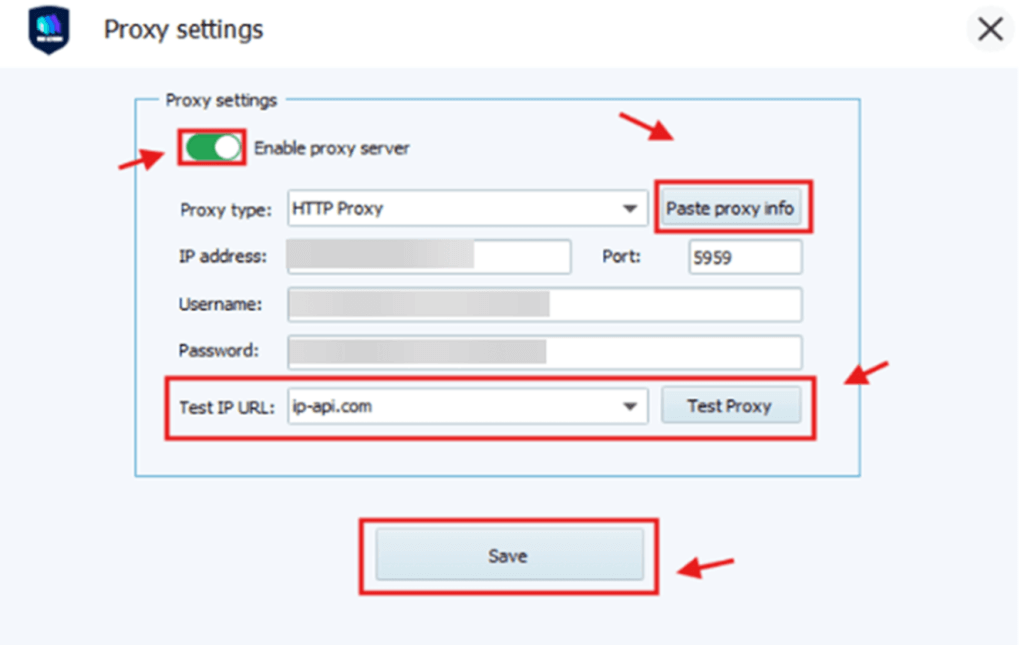
- First, toggle Enable the proxy server to ON.
- Then, click "Paste proxy info" – VMLogin will automatically fill in the IP, port, username, and password.
- In the Test IP URL field, enter `ip-api.com`.
- Click Test Proxy to verify the connection.
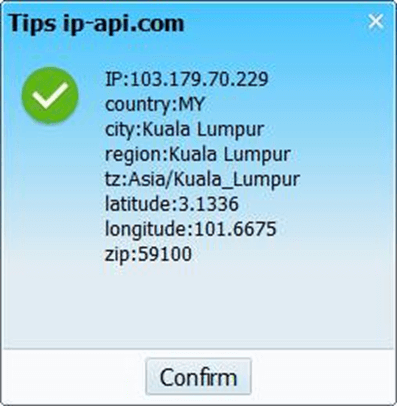
5. If the proxy is set up correctly, you’ll see a success message with the new IP and location. Click "Confirm" and then "Save" to store the settings.
6. Save the Profile.
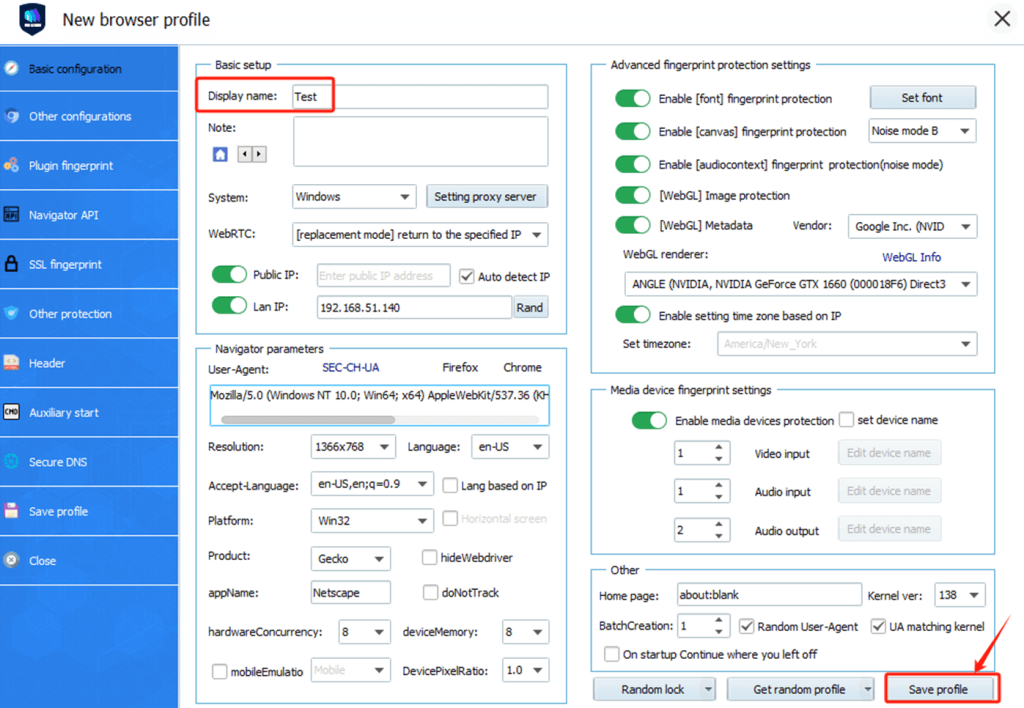
Your new profile with proxy integration is now ready.
7. Launch the Profile.
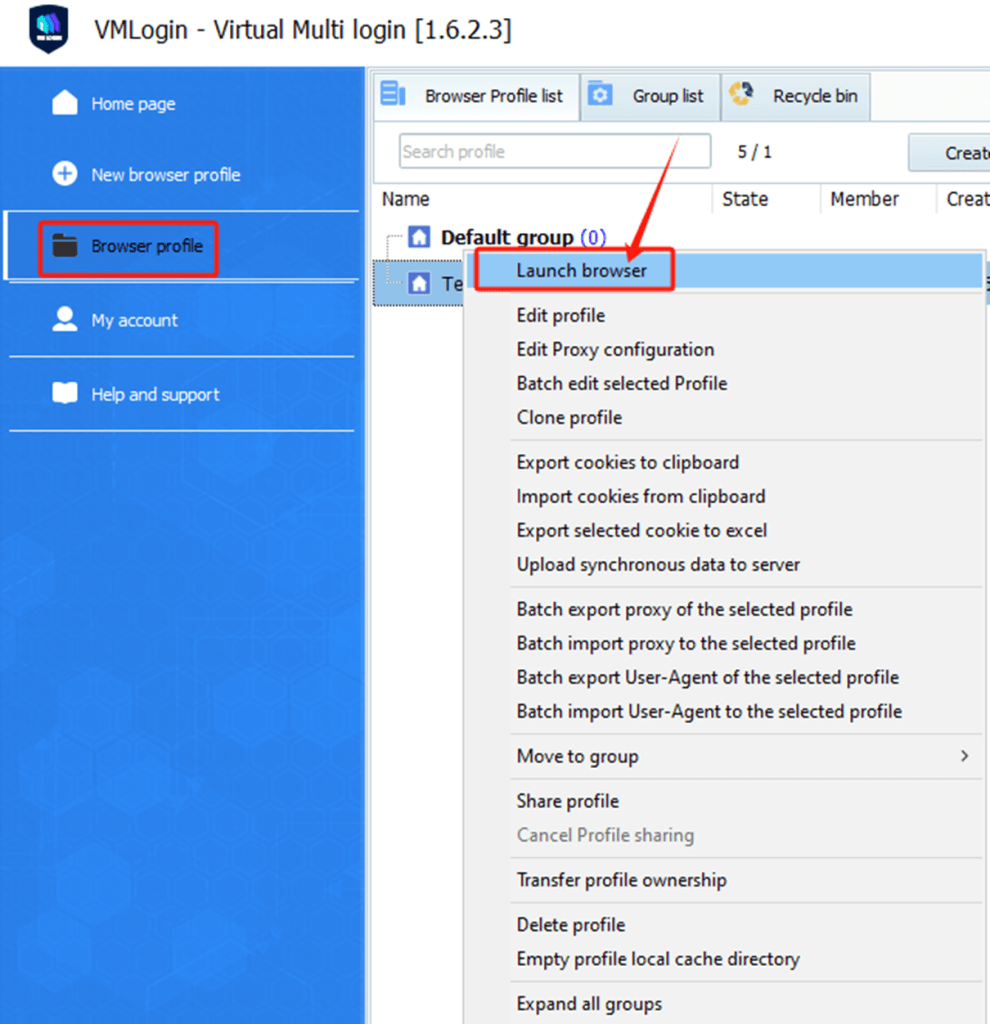
This will launch a new browser instance using the custom fingerprint and proxy you’ve set. Astro and VMLogin make a natural pair: VMLogin handles browser profiles and security, while Astro delivers reliable proxy connections with full flexibility. Together they give you a smooth and transparent setup for daily work.
Astro is built as an ethical proxy ecosystem: every IP is sourced with user consent, and all clients pass verification. We value trust above all — that’s why our network is safe, transparent, and fully compliant. Choosing Astro means working with a responsible partner who puts fairness and reliability first.
Note: VMLogin browser software itself has no proxy IP service, users need to purchase proxy IP from a third party. Proxy-related tutorials are provided by third-party platforms and unrelated to the VMLogin. Users are strictly prohibited from using VMLogin to engage in any illegal and criminal activities, and users are responsible for the relevant responsibilities caused by using VMLogin.