Step 1 — Get Your Gonzo Proxy Credentials
1. Access GonzoProxy dashboard. Registration takes 30 seconds via Google account - no documents or verification needed.
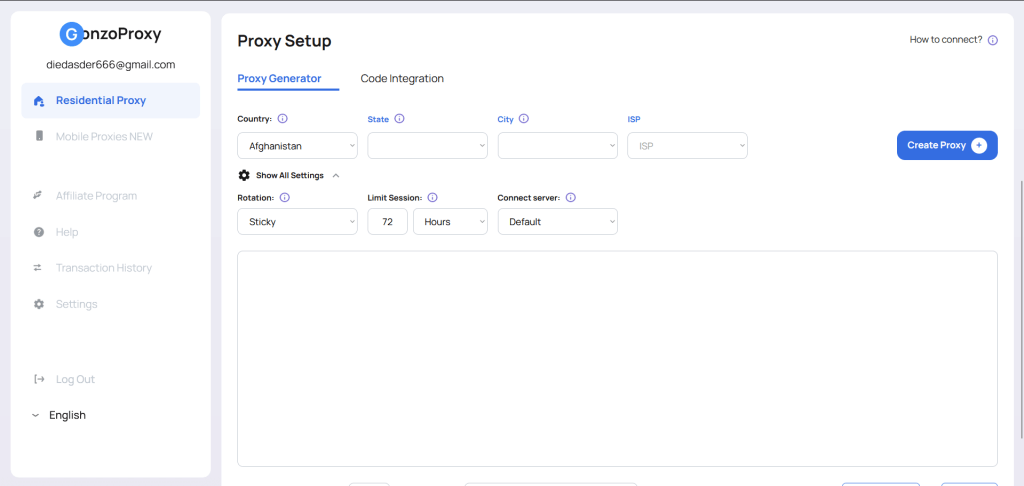
2. Navigate to "Create Proxy" section. Configuration options:
Geographic targeting: Select country and city for proxy location. Running US Facebook ads? Choose American city. Managing UK Amazon account? Pick British location. Gonzo offers 190+ countries, 2000+ cities.
ISP selection: Advanced feature unique to Gonzo - choose specific internet provider like Comcast, AT&T, Verizon. Most services charge extra for this precision. Gonzo includes it free.
Rotation:
- Sticky: The IP remains stable for a set period — from 30 seconds to 7 days.
- Randomize IP: New IP each request (for web scraping)
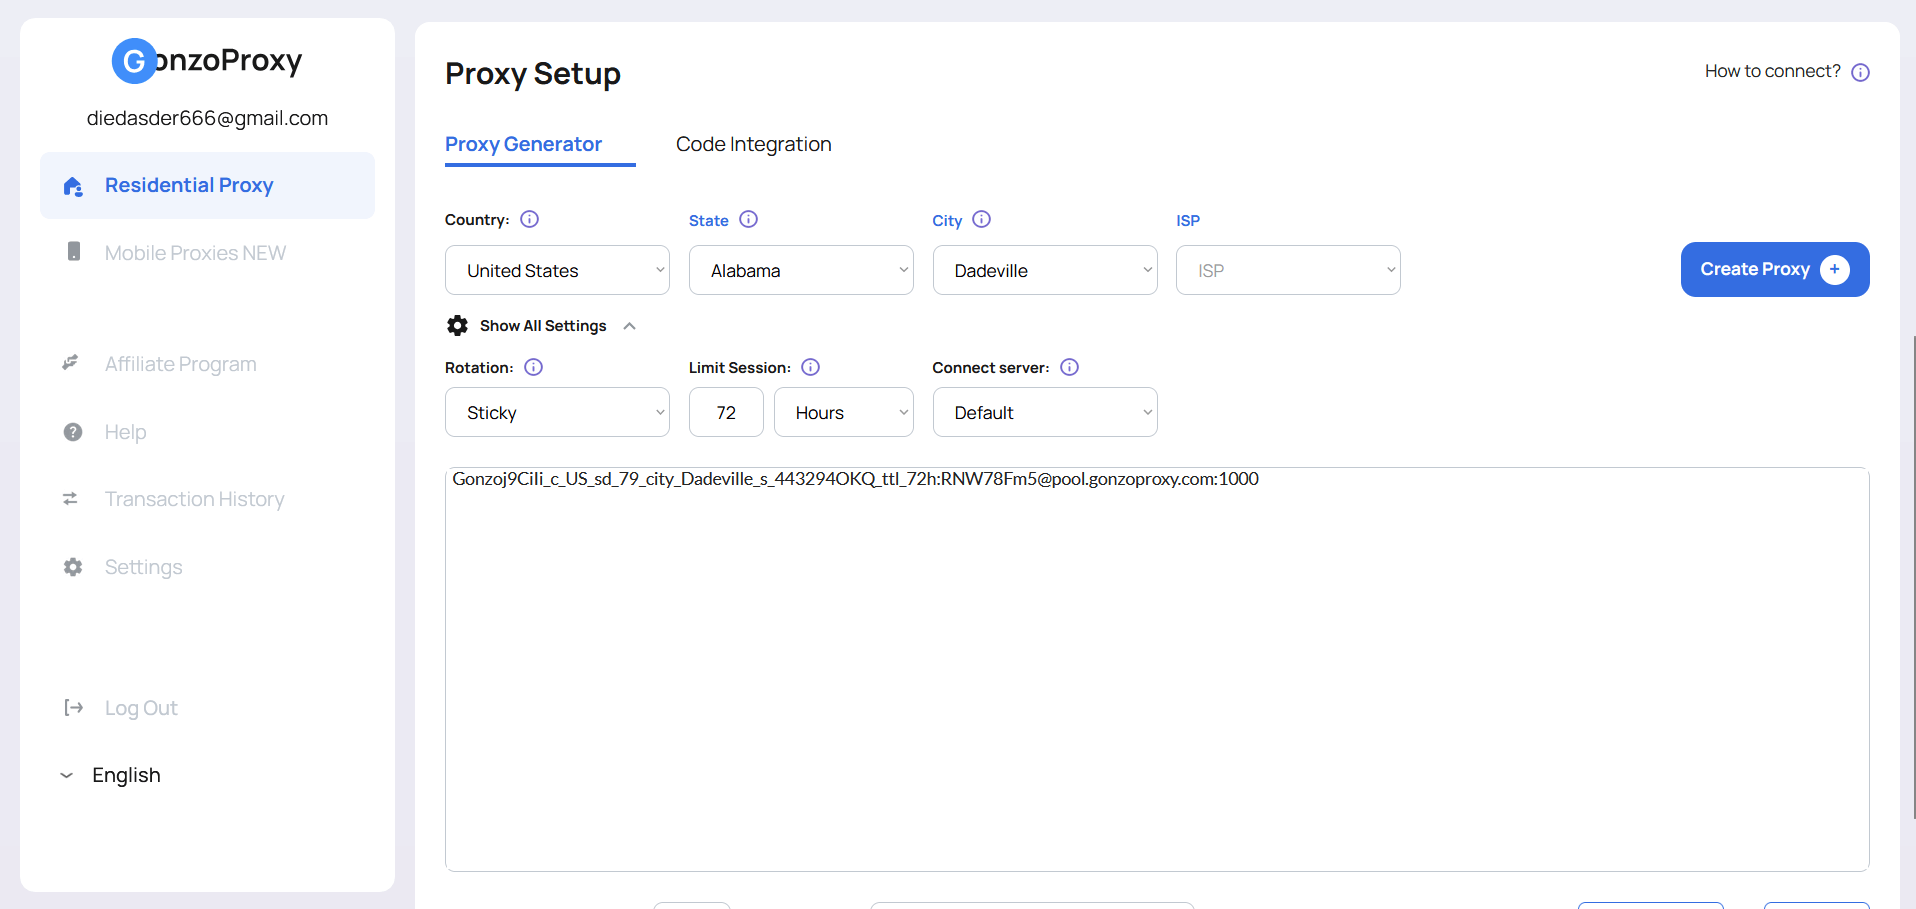
3. Click "Generate" to receive credentials:
- Host: pool.gonzoproxy.com
- Port: 1000
- Username: Unique identifier
- Password: Unique password
Important: Create separate proxy for each VMLogin profile. Never share proxies between accounts.
Step 2 – Add Proxy to VMLogin
1. Download and install VMLogin. (3 Days Free Trial)
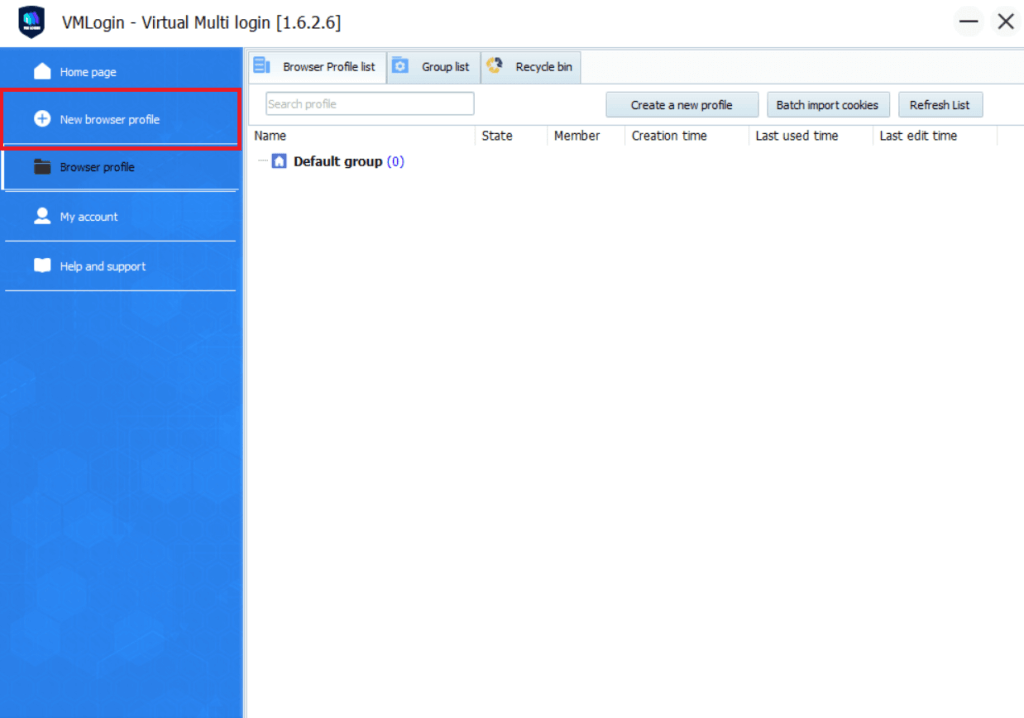
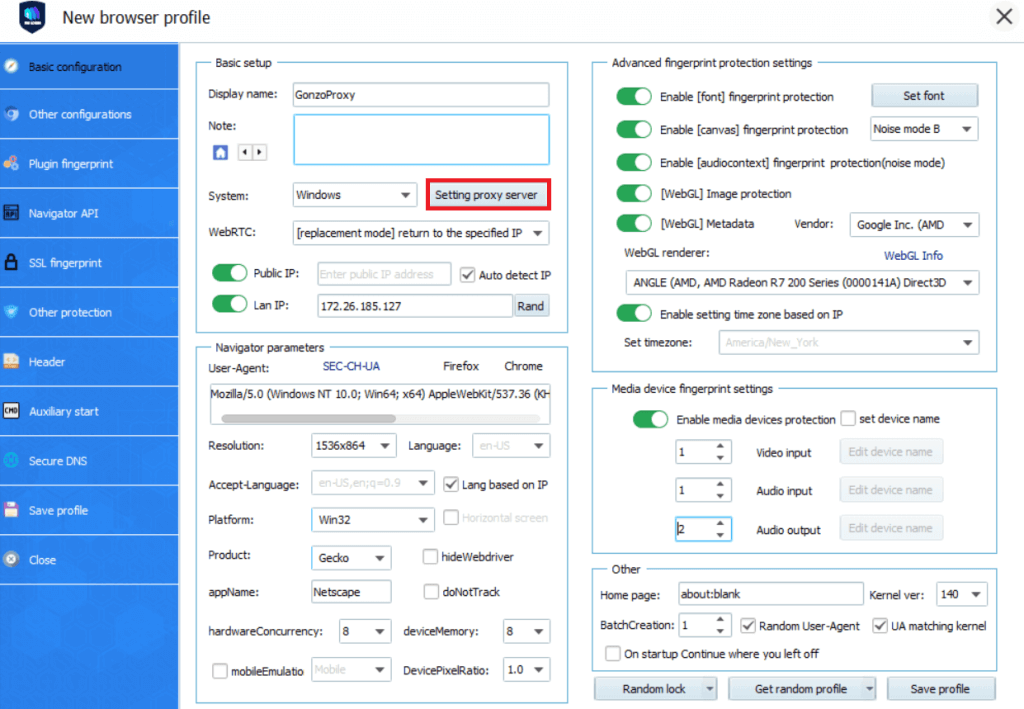
2. Click "New Browser Profile" button to create a new browser profile.
Essential settings for new profile:
- Profile name: Use descriptive naming like "FB_Ads_Cosmetics_US" or "Amazon_Books_Store_01"
- Operating system: Match target audience (Windows, mobile for Instagram)
- Browser version: Recent Chrome/Firefox versions appear most natural
- Screen resolution: Popular resolutions like 1920x1080 or 1366x768
Advanced fingerprint parameters automatically randomized by VMLogin:
- Canvas fingerprint (unique drawing characteristics)
- WebGL properties (graphics rendering details)
- Audio context (sound processing signatures)
- Font list (installed typefaces)
- Hardware concurrency (CPU core count)
- Device memory (RAM amount)
These technical details create unique identity for each profile. Websites cannot detect you're using same computer for different accounts.
3. Select "Proxy" tab to connect GonzoProxy credentials with browser profile.
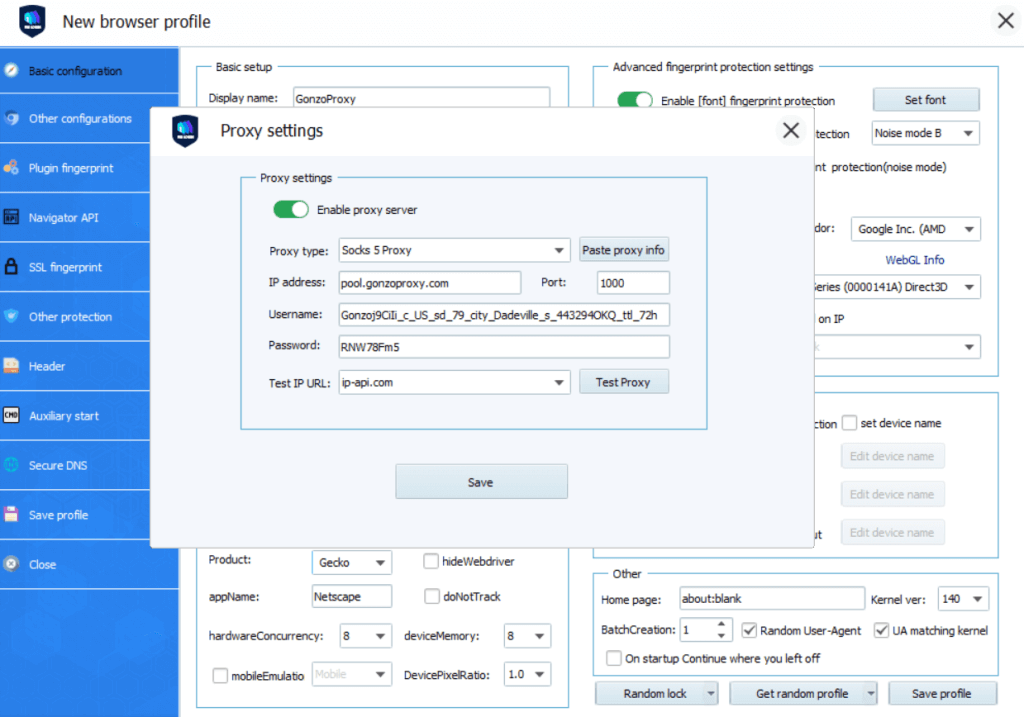
4. Proxy setup process:
- Choose proxy type: SOCKS5 recommended for best compatibility
- Enter host address from Gonzo dashboard
- Input port number
- Add username and password for authentication
- Enable "Use proxy for DNS" - prevents IP leaks
5. Click "Check Proxy" button to verify proxy connection.
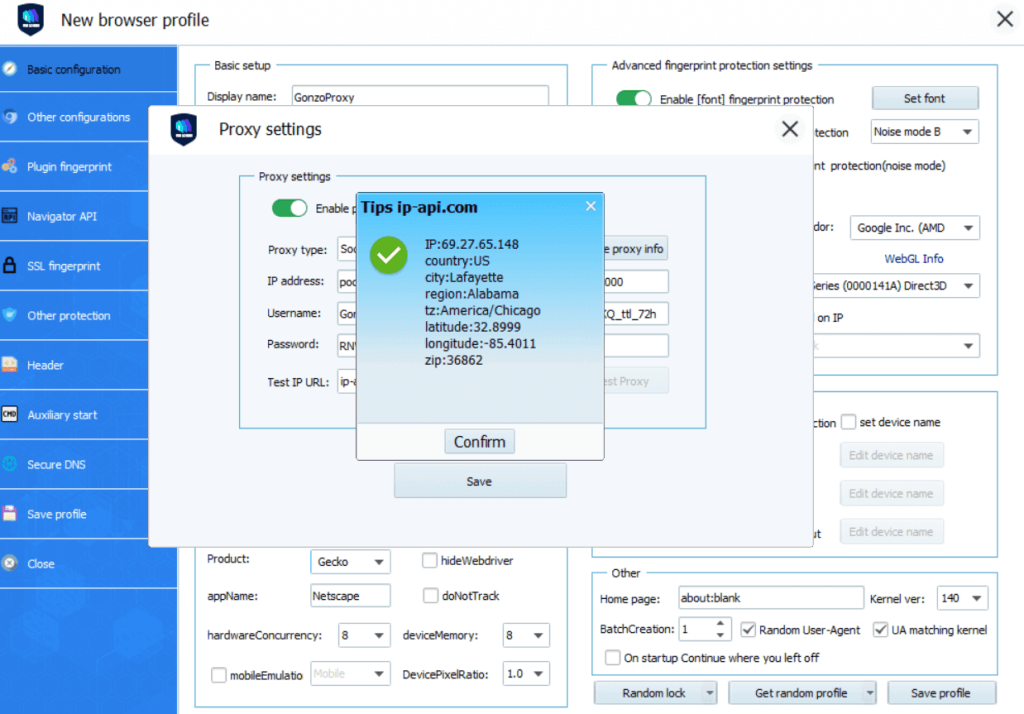
Successful test shows:
- Green checkmark icon
- Detected country/city matching Gonzo selection
- IP address different from your real location
Common test failures and solutions:
- "Connection refused" - Verify credentials in Gonzo dashboard
- "Authentication failed" - Check username/password spelling
- "Timeout error" - Contact support
6. Save the profile and launch.
Note: VMLogin browser software itself has no proxy IP service, users need to purchase proxy IP from a third party. Proxy-related tutorials are provided by third-party platforms and unrelated to the VMLogin. Users are strictly prohibited from using VMLogin to engage in any illegal and criminal activities, and users are responsible for the relevant responsibilities caused by using VMLogin.