Obtain proxy credentials
Step 1: Log in to the Mango Proxy Dashboard
1. Open the Mango Proxy website and log in to your account.
2. In the left sidebar, choose the proxy type you want to use:
- Dynamic Proxies (Residential, ISP, Datacenter)
- Static Proxies (ISP or Datacenter)
Step 2: Purchase Traffic or IPs (If Needed)
- Go to the Pricing section.
- Select the required plan (traffic-based or IP-based, depending on proxy type).
- If you have a promo code, enter it in the Promo code field and click Apply.
- Complete the purchase by clicking Checkout.
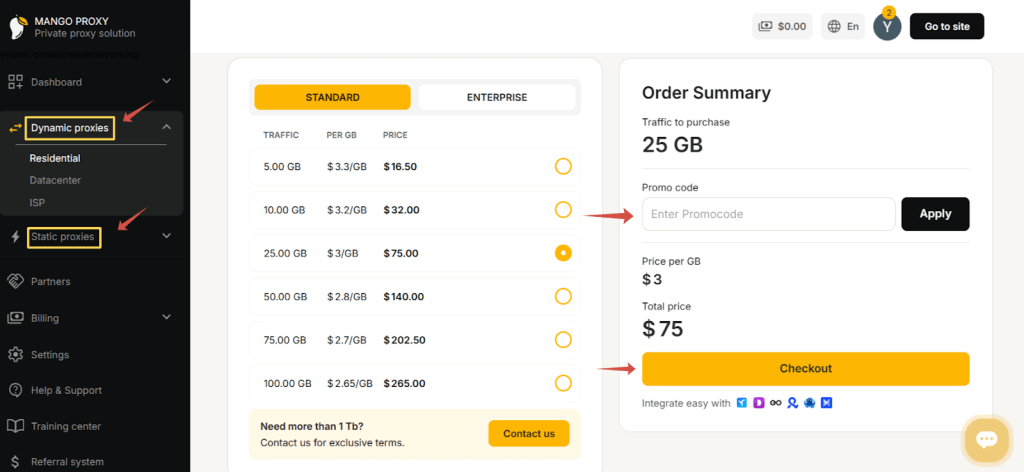
If you already have active traffic or IPs, you can skip this step.
Step 3: Open Proxy Setup
- Navigate to Proxy Setup in the top menu.
- Make sure you are on the correct setup page for the selected proxy type.
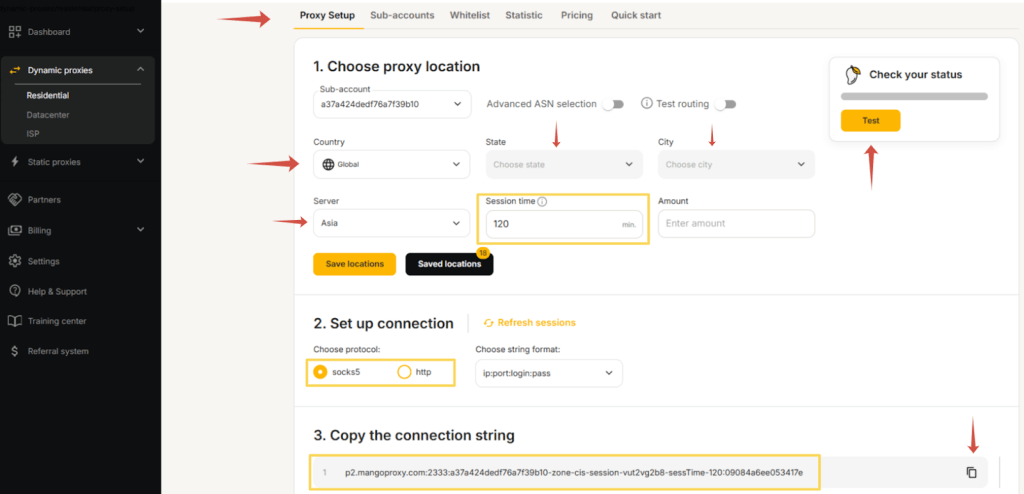
Step 4: Configure Proxy Parameters
On the Proxy Setup page, configure the following settings:
- Sub-account
Select an existing sub-account or create a new one. - Country
Choose a specific country or leave Global for automatic geo-rotation. - State / City (optional)
Select if precise location targeting is required. - Server
Choose the proxy server region (e.g. Asia, Europe, USA).
Tip: Select a server geographically close to the target IP region for best performance. - Session Time (for dynamic proxies)
Set the IP rotation duration in minutes. - Amount
Define the number of simultaneous connections.
Click Check on the right side to test availability.
Step 5: Set Connection Settings
- Choose the connection protocol:
- SOCKS5 (recommended)
- HTTP
- SOCKS5 (recommended)
- Select the preferred connection string format.
Step 6: Copy Proxy Connection Data
After clicking Check, Mango Proxy will generate the connection details:
- Protocol
- Host
- Port
- Username
- Password
Click the copy icon to copy the full proxy string.
💡 Tip:
You can save this configuration for future use using Save locations or Saved locations.
Configure VMLogin with Mango Proxy
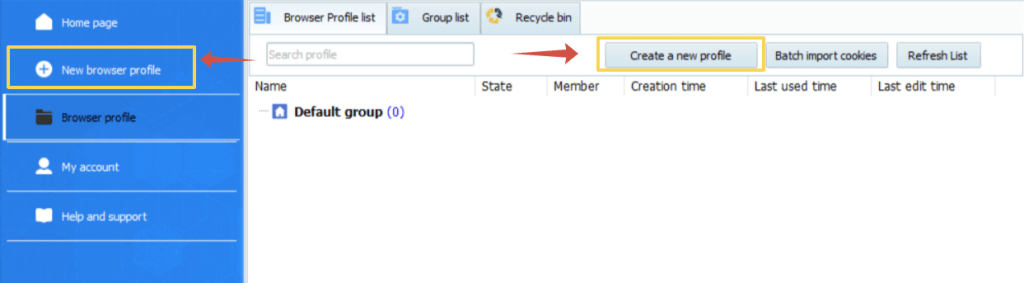
Step 1: Create a New Profile
- Launch VMLogin.
- Click Create New Profile.
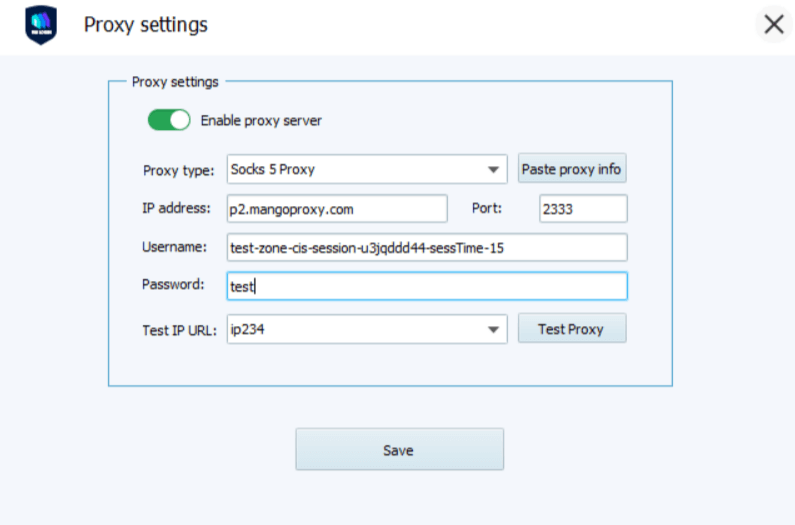
Step 2: Open Proxy Settings
- Open the Proxy Settings section.
- Enable Proxy Server.
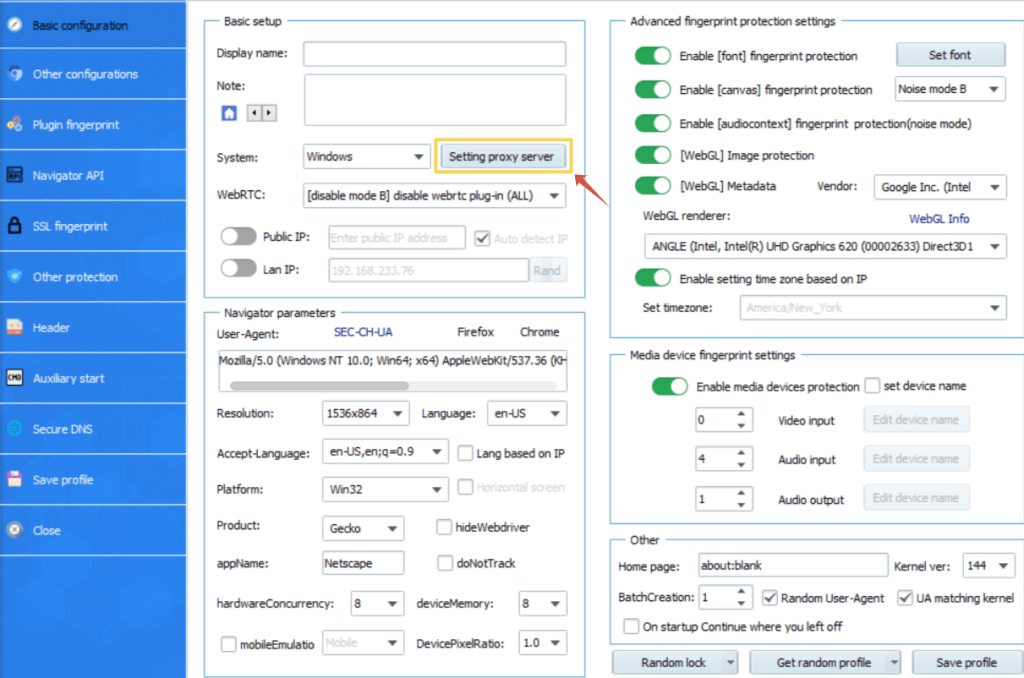
Step 3: Enter Proxy Details
Fill in the proxy fields using the data from Mango Proxy:
- Proxy Type: SOCKS5 / HTTP / HTTPS
- Host: proxy host provided by Mango Proxy (e.g., p2.mangoproxy.com)
- Port: proxy port (for example, 2333)
- Username: Mango Proxy login
- Password: Mango Proxy password
The generated connection string contains all required proxy credentials.
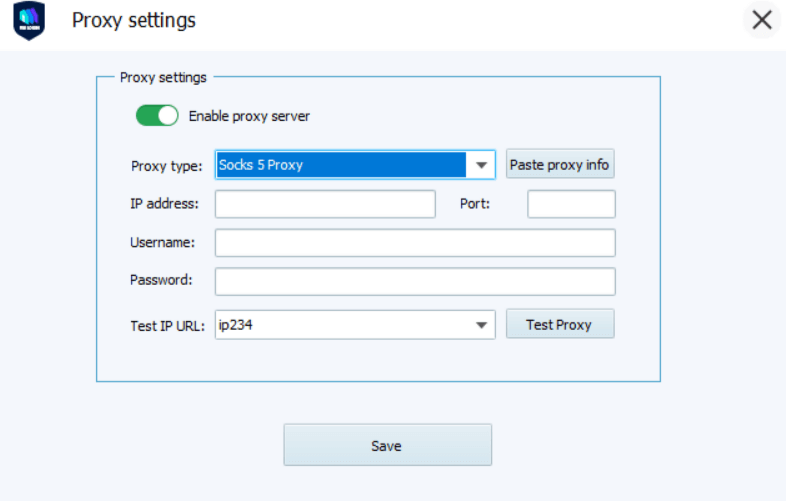
Step 4: Test and Save
- Click Test Proxy.
- After a successful test, click Save.
- Start the profile — VMLogin will launch with Mango Proxy enabled.
Note:
VMLogin browser software itself has no proxy IP service, users need to purchase proxy IP from a third party. Users are strictly prohibited from using VMLogin to engage in any illegal and criminal activities, and users are responsible for the relevant responsibilities caused by using VMLogin.