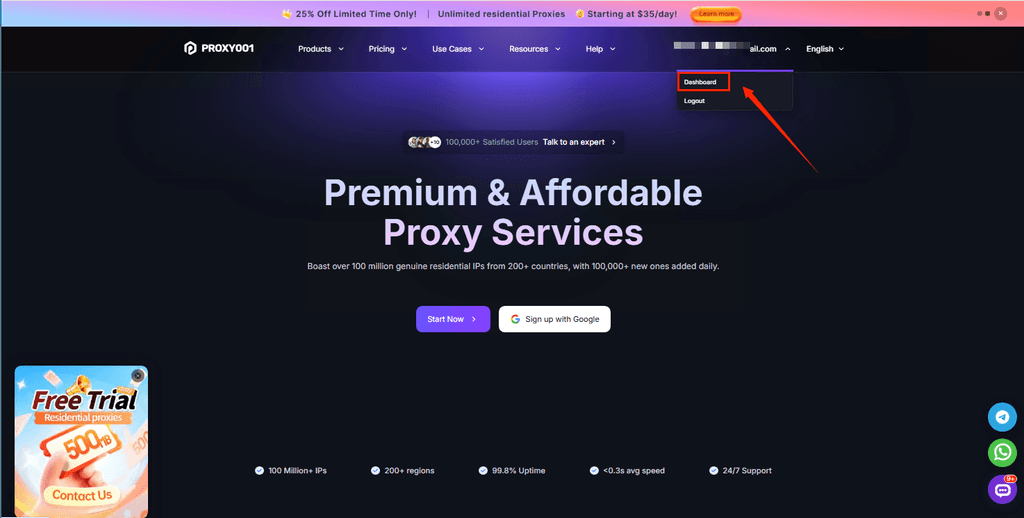
- Visit the Proxy001 website (register via this link, then contact customer service to receive a 500MB trial), complete the registration process, log in, and click [Dashboard].
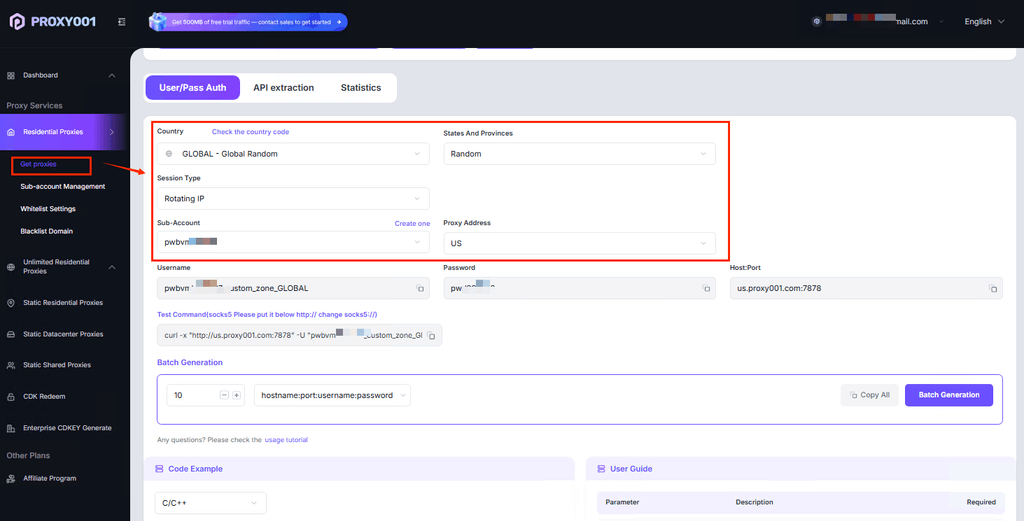
- Go to [Dashboard] → [Residential Proxies] → [Get proxies].
Configuration parameters:
- Username/password: auto-assigned by system
- Country selection: specify or random
- City selection: optional targeting
- Port: auto-assigned
- Session mode:
- Sticky IP (1–180 min configurable)
- Rotating IP (changes per request)
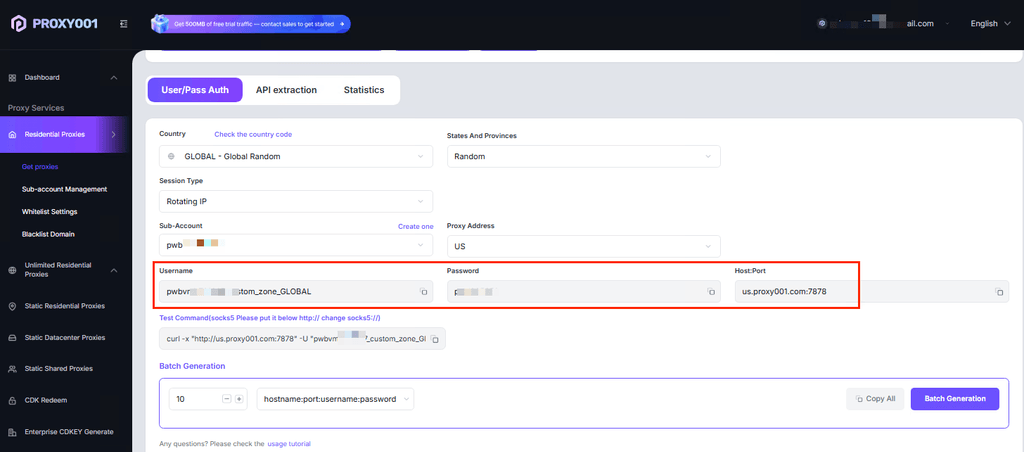
- Proxy format output, You will receive a file in the standard format:
Host:Port:Username:Password
Please keep this information safe. It will be used for configuration fields in VMLogin.
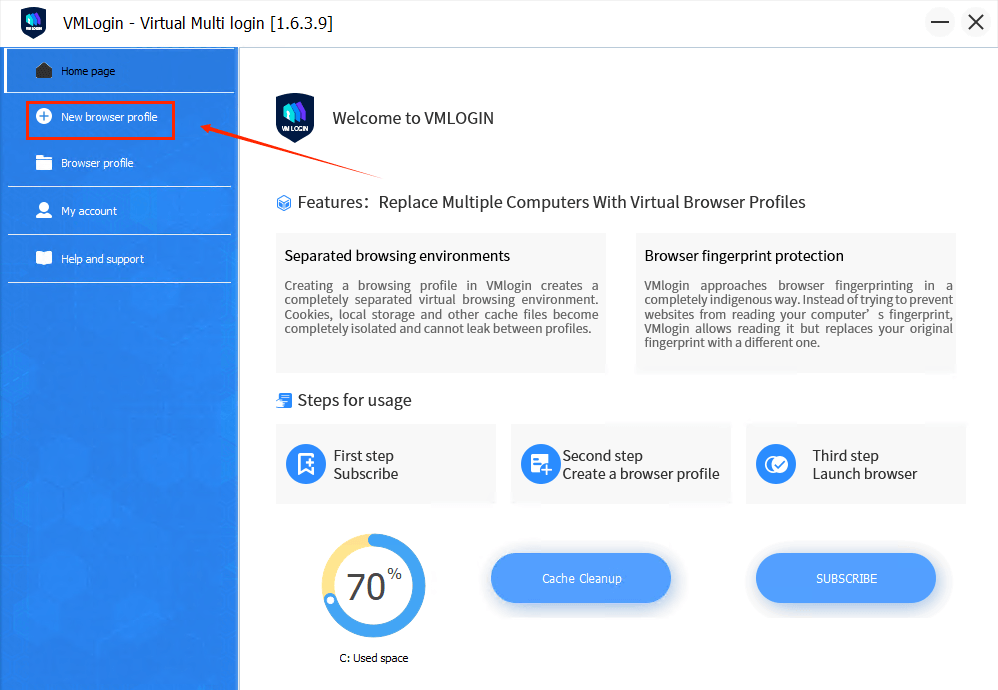
- Open the VMLogin client, log in to your account, and click [New Browser Profile] on the home page. (Supports a 3‑day free trial.)
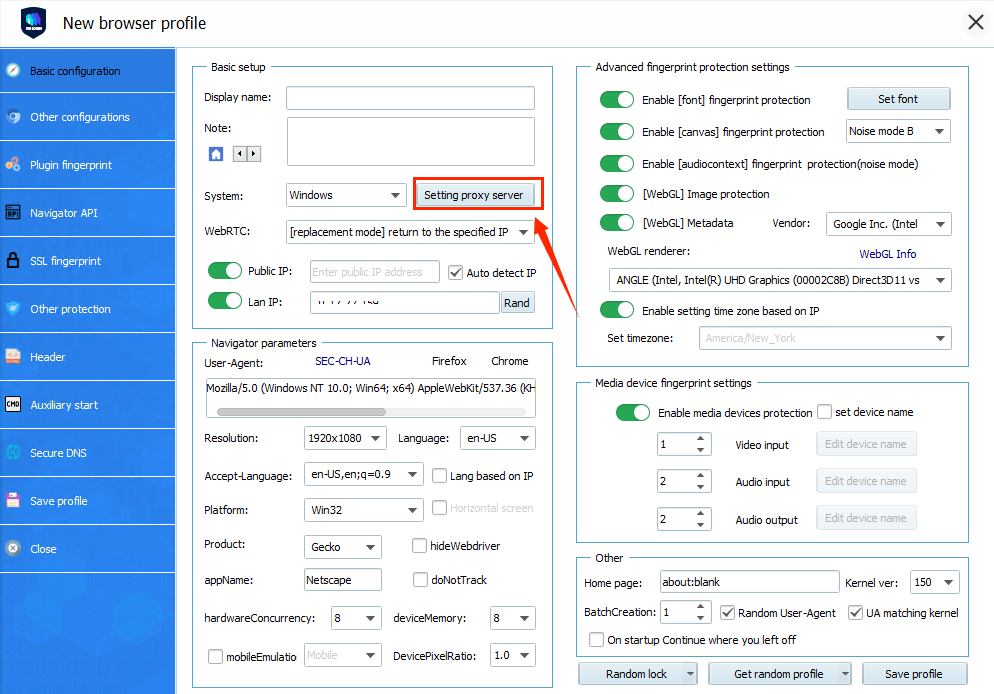
- On the Basic Configuration screen, set the display name, then click [Setting Proxy Server ]
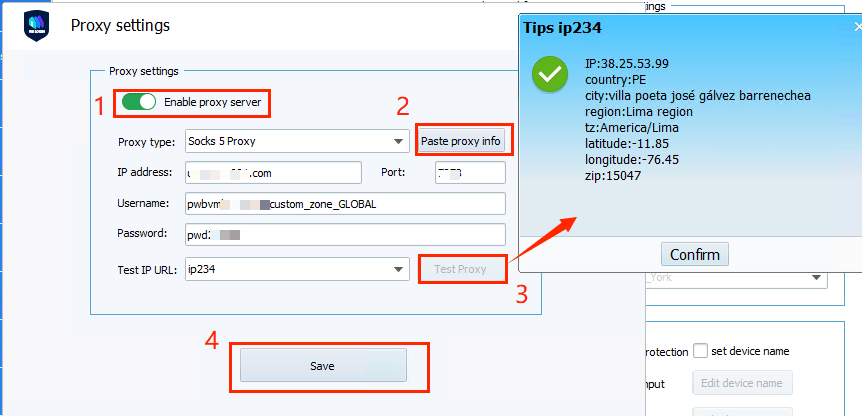
- Select [Enable Proxy Server]. Choose the proxy type as needed. Copy the proxy information from the Proxy001 backend, click [Paste Proxy Info], then click [Test Proxy]. After the test succeeds, click [Save], the proxy is now set up!
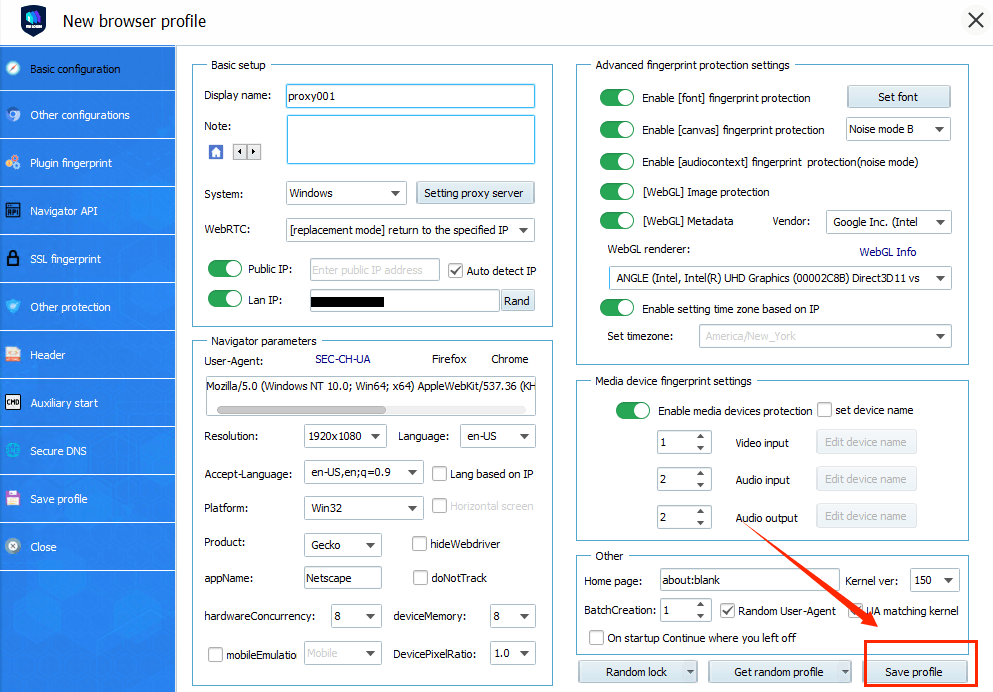
- Save profile.
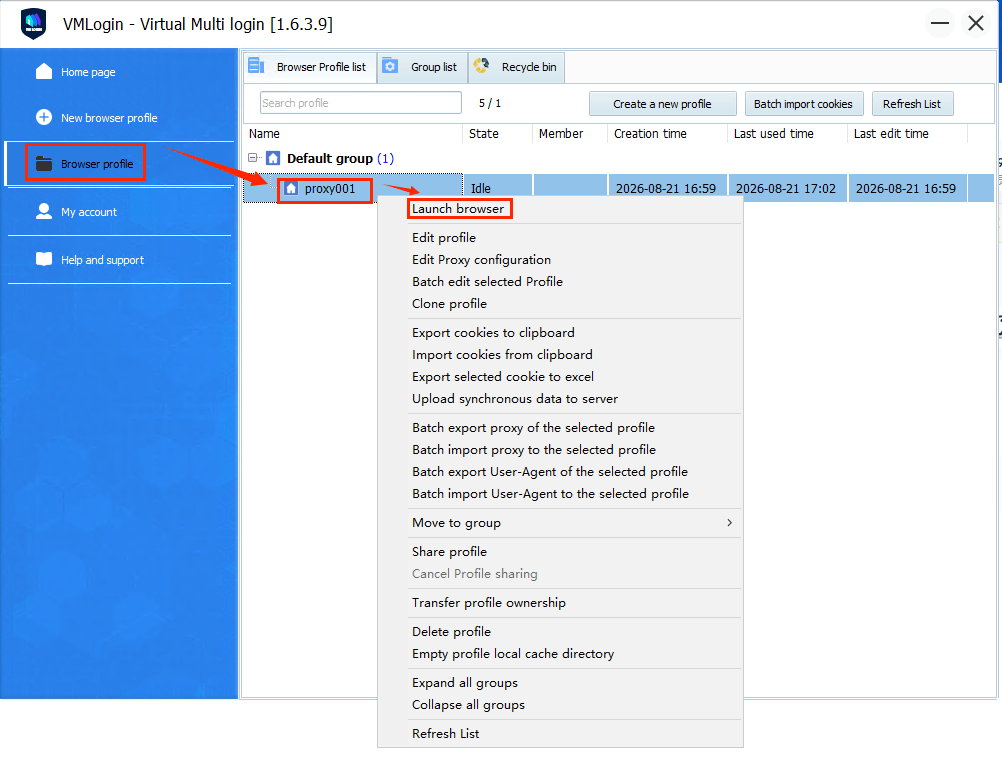
- Select the profile you just configured with the proxy, right‑click it, and choose [Launch Browser]. You can now start using the VMLogin browser with the configured proxy.
Note: VMLogin browser has no proxy IP service, users need to purchase proxy IP from a third party. Proxy-related tutorials are provided by third-party platforms and unrelated to the VMLogin. Users are strictly prohibited from using VMLogin to engage in any illegal and criminal activities, and users are respon