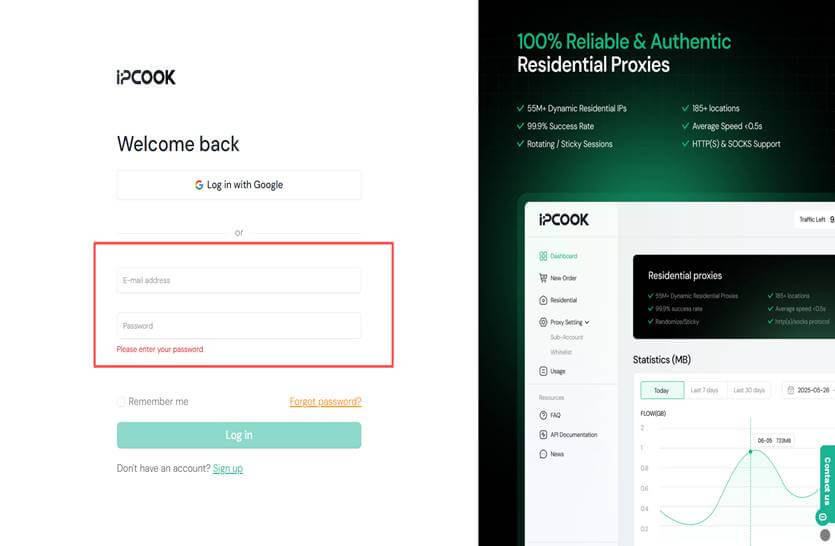
Step 1: Visit the IPcook official website. Log in with your existing account, or click Sign up to create a new one.
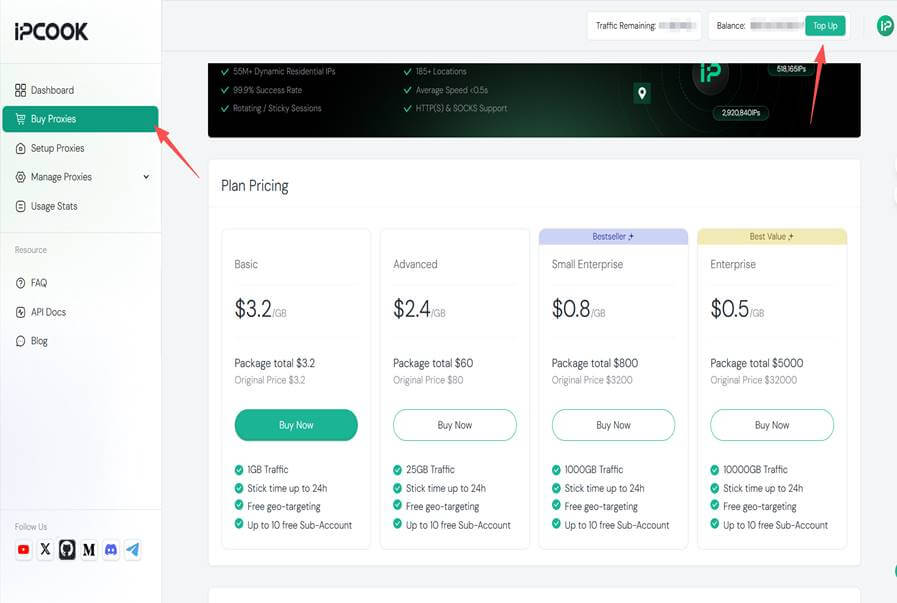
Step 2: Go to the Buy Proxies tab on the left sidebar. Click Top Up to add funds to your account, then select a proxy plan based on your preferred country, protocol, and data amount. Click Buy Now to complete the purchase.
Step 3: Open the Setup Proxies page. Choose your settings such as country, city/state, protocol (HTTP or SOCKS5), and rotation mode (Randomize IP or Sticky IP). If you want to allocate data or allow multiple users, create a sub-account and assign data limits. After saving the configuration, you will see your complete proxy details, including hostname, port, username, and password.

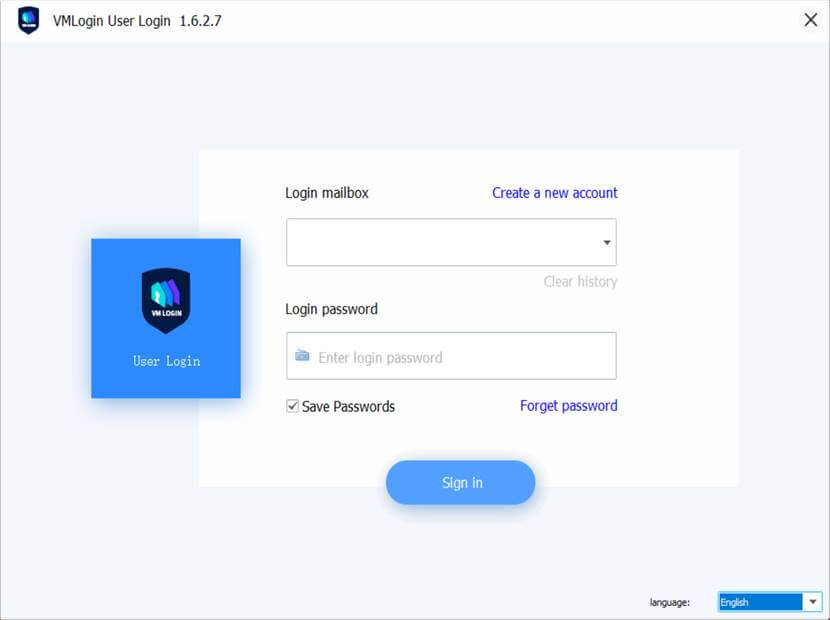
Step 4: Visit the VMLogin official website, download, and install the VMLogin client.
New registered users can get a 3-day free trial.
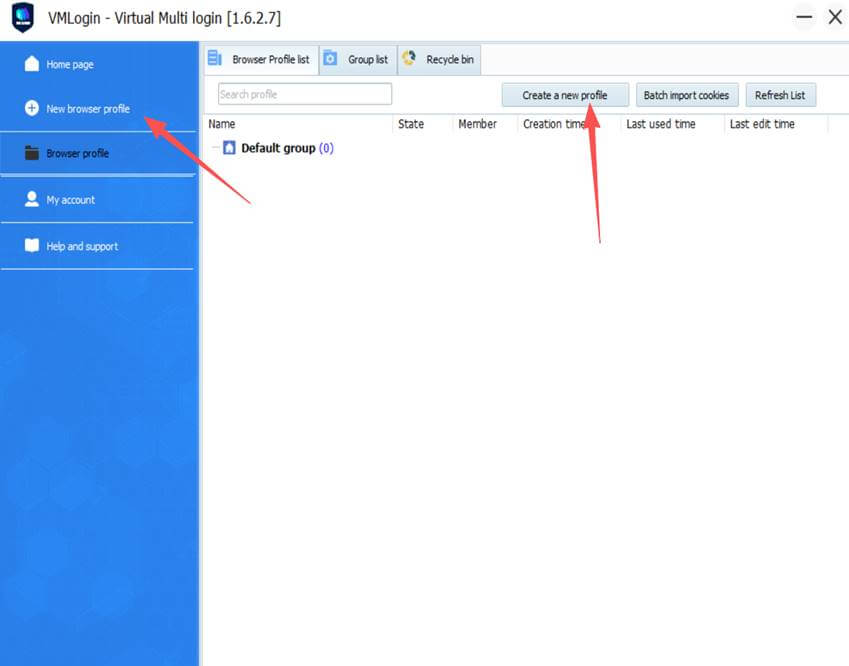
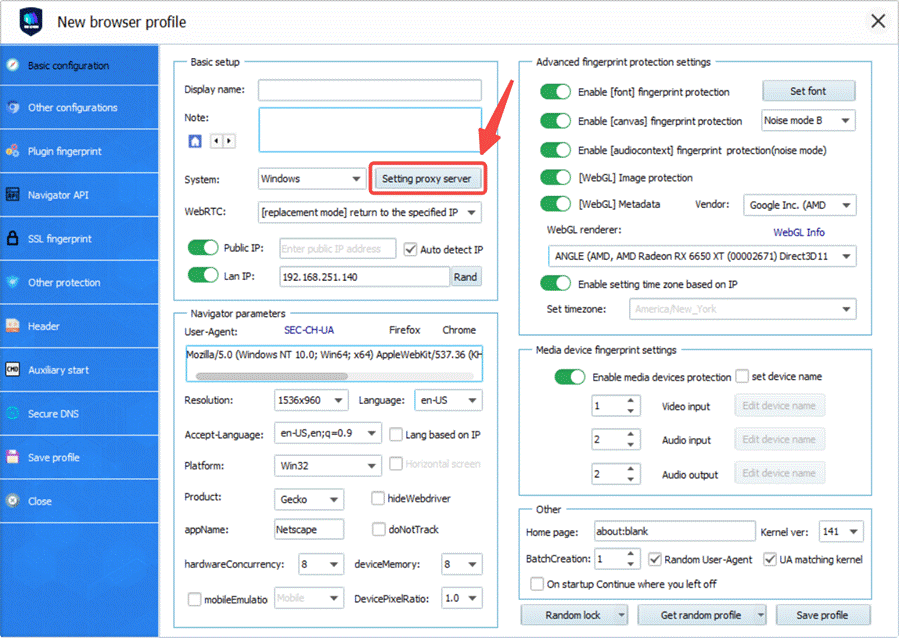
Step 5: Select New browser profile or Create a new profile to create a new browser profile.
Step 6: On the setup window, click Setting proxy server to add the proxy you get from IPcook.
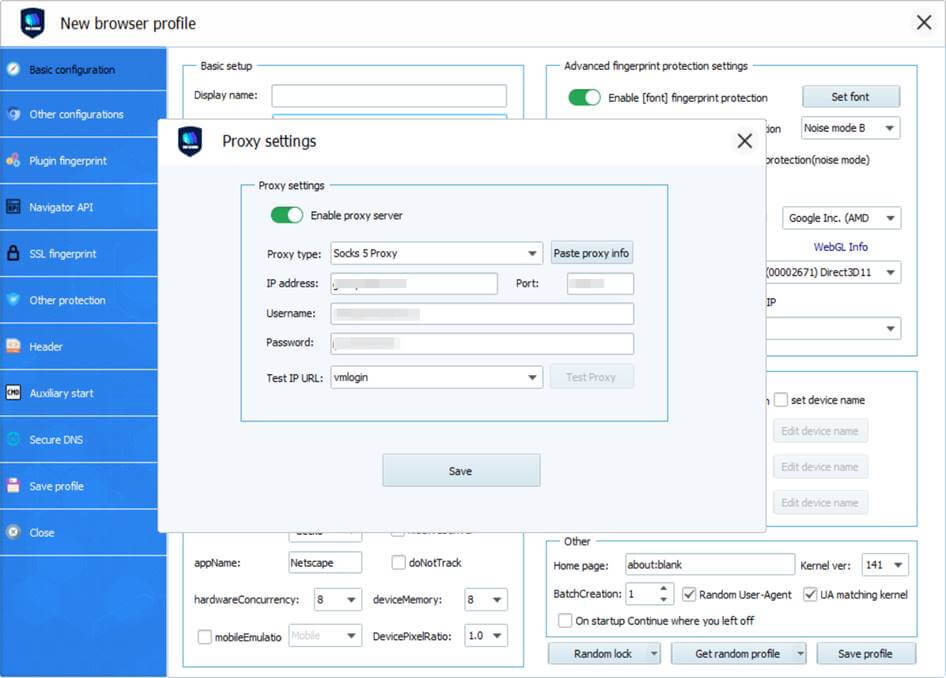
Step 7: Select the protocol of your proxy. Then, enter all your proxy credentials from IPcook, including the IP address, port, username, and password.
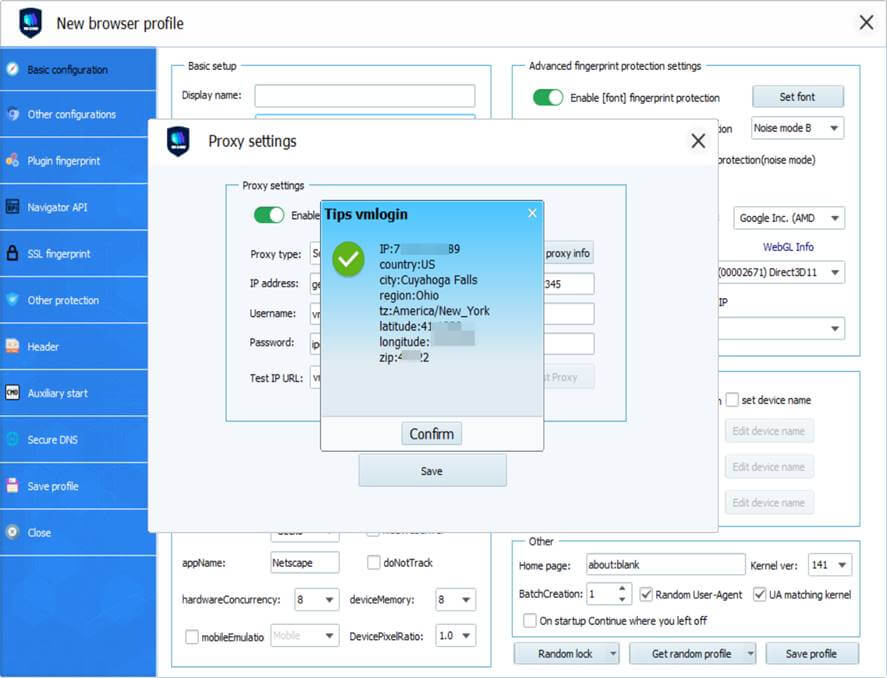
Step 8: Click Test Proxy to test if the proxy really works for the browser profile. If the message below pops up, then the proxy is all good to go! Just click Confirm and then Save. Now the proxy server is well set up!
Note: VMLogin browser software itself has no proxy IP service, users need to purchase proxy IP from a third party. Proxy-related tutorials are provided by third-party platforms and unrelated to the VMLogin. Users are strictly prohibited from using VMLogin to engage in any illegal and criminal activities, and users are responsible for the relevant responsibilities caused by using VMLogin.